Showing posts with label advice. Show all posts

Tuesday, October 12, 2010

Shooting & Postprocessing Fall Colors Images

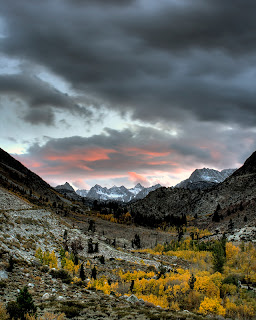
Fall is one of my favorite times to shoot, as California's Sierra Nevada is decorated with colorful leaves: in the trees, on the ground, and alongside creeks and lakes. Aspen leaves are flat and shiny, and they point and rotate in virtually any direction, so in my approach a primary shooting consideration is the reduction of color-killing glare. Whether the lighting conditions are sunny or cloudy a circular polarizing filter, properly rotated to darken the image (the visual effect when you cancel out the glare), will enable the full color of the leaves to shine through and get captured by your camera's sensor. In fact, I drive around with polarized glasses on (in all seasons) so I'll recognize more potential shots. There can be issues with polarizers producing uneven results in solid blue skies if you're using wide to ultrawide lenses, so you may have to shoot a given scene with the polarizer on and off so you can select the best one later, and so you'll have the option of superimposing the two images and using Photoshop layer masking to use the Fall colors from one image and the blue sky from the other (more trouble than I currently go to, but a valid option nonetheless).

Optimizing your camera's capture of the color is only the first challenge however. Once you view your RAW file in your favorite editing program, you often find that the camera failed to capture adequate contrast and it assigned an automatic white balance which dramatically changed color as well.

That was my experience as I viewed photos of Parker Lake which I took during the Mountain high Workshops Fall Colors session last week. The yellow aspen at the far end were changed to a dull orange-brown, and the gren was overly dull as well. One however I shot of the attendees and lake from behind the trees when I first arrived, and the Fall colors on the far side turned out a lot brighter and more yellow, more like what I remembered from being there.
MHW Fall Colors Workshop

To restore that yellow to my other Parker Lake shots, first I tried a few white balance settings... changing from As Shot to Auto and Daylight, and possibly even bumping the color from there towards cold (blue) or warm (orange). Your mileage may vary based on your camera's sensor, so what I actually ended up with is irrelevant; the process is more important.

What really did the trick however was to go into the Develop tab/menu and where the color sliders are in the right column under the HSL / Color / B&W heading, first I set the sliders to Luminance (brightness) and made the yellow trees brighter, then I changed the sliders to Saturation and I gave just the yellows a bit of an increase until the trees matched the other photo with more natural color. I did a similar thing to a lesser degree to the greens, which also seemed duller than what I saw onsite.

Two additional adjustments that can often imporve the outcome are Develop - Presence - Saturation (of course, although if I use it at all I prefer to keep it minor and subtle, under 5%), increasing contrast (which you'll see improves color on most images taken at -2/3 EV or brighter... i.e. most exposures), and Library - Saved Preset - Punch, which seems to perform something analogous to a local content-aware contrast adjustment (it either improves the result or it doesn't, so I'm always ready to Ctrl-Z undo it).

I'm not sure what caused the camera to go so far off on the color for that sequence of Parker Lake shots, perhaps the green algae and brown mud on the lake bottom, but the corrected version seems much more natural to me. I've upload both the behind-the-trees shot and this adjusted reflection shot so you can see how the edits turned out on the reflection one.

If you don't have Adobe Lightroom, you can download a free trial, which will be active for 30 days from your first use. Adobe also periodically posts Beta versions for public use (you have to find the Beta download section of their site), which tend to work (with some bugs) for months.

Since I started using Lightroom I no longer have a copy of Photoshop CS installed on my latest laptop, and I hardly ever use Photomatix any more. Lightroom is simply more efficient to use, and it produces excellent results.

One of the key features I use a lot are software GND filters under the Develop (look for a little GND-looking icon near the top of the right column). I often use Cokin GND filters when I shoot, but additional fine tuning is extremely helpful.

A huge productivity boost comes from Lightroom being able to copy editing functions from one photo to many others from that shoot
(Library - right click over photo - Develop Settings - Copy). Since I bracket exposures, I can edit one dark one, one medium one and one light one, then copy those basic edits onto dozens of similarly exposed photos, then simply pick the best results to make some additional minor optimizations to. I even copy dust spot removal from one photo to adjacent ones, then simply adjust a few spots where the content in the new shot requires cloning from a different place (easy to do, difficult to describe... it'll make more sense when you try it).

Lightroom also helps you become deeply familiar with your camera's results. For example, without other experience I'd expect that a 0EV exposure might provide an excellent compromise as the image to work with and edit, and I've heard that a slightly overexposed image would offer more detail (a larger file size), but through using Lightroom and editing three bracketed exposures side by side, I've found that for my camera a 2 stop underexposed image often offers the best color and contrast, so at a minimum I'll edit the darkest file for reference, then see if I can get the middle exposure to look as good. Sometimes the middle exposure gets close if I increase contrast, but often I still choose the darkest one as the best (with a little extra noise reduction). I should mention that my most common bracketing and exposure compensation settings are: bracking of +/- 1 1/3 stop, biased -2/3 stop, resulting in exposures of -2, -2/3 and +2/3 EV. I should add the disclaimer that those settings do seem camera dependent... some of the workshop attendees' cameras seemed to perform better a 0EV, without the -2/3 stop compensation (which works well on my Canon 5DII).

The two things would like to have from Photoshop are adjustment layers / layer masking and free downloadable actions (such as one which enables you to make a star trails shot from multiple 30 second night shots). In some rare instances I might enjoy panoramas/stitching and content aware fill, but I prefer the shooting end of the creative process, not editing, so I tend not to get around to postprocessing which requires a lot of time. It's either easily and quickly available from the in-camera result, or I simply move on to work with another image.

For more tips, search my blog as follows:
http://activesole.blogspot.com/search?q=technique+tips

Wednesday, June 17, 2009

16 Tips for Better Landscape Photography

This is an updated and expanded version of an article I wrote a few years ago. Note the embedded links to related articles.

I recently received an email from someone who wanted to know how I took such nice shots, and she mentioned that she carried a point-and-shoot camera. I replied that you can get great shots with a compact camera, and I sent her suggestions that evolved into this list. I miss my 5MP compact (no dust spots to edit out of photos) and the examples in this article were taken with it. Even when the optics and features aren't the greatest, creative composition, how you treat your subjects, and your use of hard filters and tasteful software adjustments can make a shot.

Here are some shooting tips and creativity ideas that can hone your technique or help you practice exercising your creative control over the results:

1. Read your camera's manual cover to cover. Be familiar with its options. After using the camera a few months, read it again to see what it has that you're not yet taking advantage of. For example, when shooting in Aperture Priority mode and shooting towards the sun, your camera's light mater will detect too much light and shorten the exposure, under-exposing the shot. You can use Exposure Compensation to brighten the exposure, to override the camera's assumptions on the correct exposure for a given shot. Digital cameras in particular have limited ability to capture the full dynamic range of a scene, the broad range of light values in it. Areas of deep shadow can be particularly challenging, often displaying a lot of digital noise. Even a "correct" exposure may have more noise than you'd like in the shadows. A slight over-exposure can reduce noise, but you risk blowing out highlights and losing detail there to distracting blobs of pure white. Fortunately you can use exposure bracketing to capture a range of exposures, and determine which ones the digital sensor responded to most favorably in post-processing. I use exposure compensation and automatic exposure bracketing for nearly every shot to get the best possible exposure. There's almost no cost to taking an extra exposure, while the cost of a return trip to a location is high, and with landscape photography you're often shooting in unique and unrepeatable conditions, so your ability to ensure that you have an exposure which optimizes all the trade-offs is priceless.

2. Shoot in RAW format if your camera offers it. On your most challenging and interesting images, adjusting white balance yourself may save your shot and you'll be glad you shot in RAW.

3. Use a tripod. You can start with a tiny, tabletop one (the REI Ultrapod, costing about $10-12 and available in two sizes, can be velcro'ed to upright objects such as fenceposts too) or even set your camera on a small bean bag. When you hike, when you get to your destination you can use your Ultrapod to convert a stick to a monopod (or tape three sticks to the legs to make a tripod).

4. Use a polarizing filter most of the time when your outdoors, and take the time to rotate it properly to cut glare and improve exposure, saturate color, and adjust contrast. Wear polarized sunglasses (even inexpensive $9-12 ones work fine) so you'll see what your camera sees. If you haven't been using a polarizer, you'll be amazed at how many more great shots you'll find, and how much more compelling the colors will be. It's important to but a filter labelled "circular" polarizer (the regular ones can wreak havok with autofocusing systems). In a pinch though even shooting through your polarized sunglasses is better than nothing. Note: using a polarizing filter with an ultra-wide lens can result in uneven darkness to blue skies, especially for horizontal-orientated shots. You still may like the rest of the shot better, so shoot on a tripod with and without the filter, which gives you the option of selecting the unpolarized shot or perhaps simply using the sky from it.

5. Use graduated neutral density filters (also referred to as "grad ND" or GND) for landscapes, particularly at sunrise and sunset. They're also handy for reflection shots, since the reflected image is 2 to 3 stops darker than your direct view of the scene. As you look around a physical landscape, your eye pupil changes size to alter its light-gathering capability, so to make a photo look "normal" you have to darken the light that the camera receives from brighter areas such as the sky (or the direct view of something that is also reflected in the same photo).

6. Think about composition for every shot. Your result will be as interesting (or as boring and pointless) as it is to you when you compose the shot. Have a clear subject in mind in every scene, and compose that scene accordingly to emphasize that element. If you don't, and simply point the camera at a bunch of hills, that lack of intention will come across in the shot and it'll simply be a snapshot of a bunch of hills. It'll hold your attention for the same miniscule fraction of a second that it took to snap it. The Rule of Thirds is a great place to start to place your subject matter, but your choice of focus point and depth of field, exposure, leading lines, and your lense/zoom factor all come into play to help highlight your subject. No matter how great the view and light is, if you can't find a clear subject (point of interest) in the scene, move. Walk around and change your perspective. Raise and lower the camera position and zoom in/out while you look through your viewfinder until you find one. Visually place something of interest in the foreground. The investment of a few extra seconds can make your results far more engaging.

7. Force your camera to focus where you want it to (point the focus point there, half-depress the shutter release to focus, then reframe to the composition you want before you trigger the shutter and complete the shot). Use autofocus mode if you want, but most of your depth of field is behind the focus point, so you get little to no benefit from the wide depth of field available from using a small aperture if the camera focuses on some object in the distance. Look up the concept of "hyperfocal distance", the distance at which your camera can focus to get the maximum depth of field. The hyperfocal point varies by sensor size, lens aperture and zoom factor, so you can cary charts or guesstimate its value, but don't ignore it.

8. Shoot earlier and later in the day. Yes, the first and last hour of light in the day is great for outdoor shots (the "golden hour"), but the 30 minutes before the sun rises and after the sun sets is when sunrise and sunset shots will have the most color (pay attention to sunset shots and see how many actually have the sun in them). I can't tell you how many times I arrive at a viewpoint just as the sun is sinking below the horizon and everyone is leaving, and I capture amazing shots that they just walked away from.

Use exposure compensation to darken the image a bit so your camera won't make the scene unnaturally light. The automatic exposure meter tries to make every shot average to a medium gray light density, as if it were in bright sunlight, so if your scene is darker (as it is after the sun sets), you'll need to tell your camera to darken the shot. As the light fades you'll need to raise ISO to make the camera more sensitive, and you may have to switch your lens to manual focus when it can no longer autofocus. Use automatic exposure bracketing as well so you won't mis-guess how dark or light to make it (good thing you read the manual as Step 1). Shoot (on a tripod) well into dusk until your camera is up against its 15 or 30 second exposure limit. Assuming you started at a small aperture for broad depth of field, when your exposure times get too long (your call when that is), gradually open the aperature to its widest setting and raise ISO until you really can't shoot any more. Experiment with putting moving objects in these long shots, especially moving water (rivers, waterfalls, ocean waves), but also people, cars, blowing trees and tall grass, and so on.

9. Use image editing software, at least Google's free Picasa  software if nothing else. Play with it to get to know it. You'll probably want to adjust white balance, contrast and color for every shot. When you have a lot of images to edit and some time to spend on them, download a free trial copy of Adobe Photoshop Elements (current version 11.0, $50-100). The spot removal and clone tools are particularly handy for D-SLR users to remove dust spots, and layers can help you produce composite photos and more professional looking portraits. Also try +Adobe Photoshop Lightroom to get more control over saturation of individual color and control of brightness and contrast in 4 different intensity levels. Typically trial software works for 30 days and even if you don't buy it, you'll be glad you had it to use for the trial period. Beware, you may get hooked on it (that's why they offer the free trial)! Later you can download the free trial of Photoshop for another 30 days (try adjusting color in the Curves function).  For some images you may find useful features in +onOne Software or in the various modules available in Google's Nik Software.

10. Consider "HDR" (High Dynamic Range) Software. Your digital camera can resolve details covering a range of about 8 to 9 stops of light. Film can resolve 11 stops, while your eye can resolve 13 stops, but a scene can span 17 stops. To improve the range of light sensitivity in digital images High Dynamic Range or "HDR" software enables you to combine multiple exposures to bring more shadow and highlight detail into your image. Use your camera's Automatic Exposure Bracketing (AEB) to take normal, darker and lighter exposures that can be combined in software to bring out additional highlight and shadow detail. For example if you take your ideal normal exposure and the camera adds exposures two stops above and below that one, combining the three images in HDR software could result in a shot covering 12-13 stops of light instead of 8-9. A leading HDR software to try is Photomatix (free trial: www.HDRsoft.com). This technology is in its infancy and realistic results can be difficult to obtain and may require significant additional processing in Lightroom and/or Photoshop. However, many people enjoy the surreal results they can get through interactively adjusting Photomatix Tome Mapping controls. Even if you're not satisfied with the results you get from HDR software today, if you take extra exposures for each shot now, you'll have them when HDR software produces better results with less effort.

11. Research your shooting locations ahead of time. For outdoor locations zoom in on +Google Earth  to see where there may be ponds or lakes to capture sunrise and sunset reflections, offshore rocks to appear in your seascape photos, and so on. I just discovered this while mapping photos in +Panoramio and Flickr, and I can't wait to return to several locations where I now have new ponds to seek reflections in.

12. Be a control freak as you travel, for at least 2 hours per day. If maximizing the quality of your photos is a priority, get agreement from your travel companions up front that the first and last hour of light in the day is when you'll be taking a lot of your shots, so breakfast and dinner will be scheduled around photography. Then see if you can actually get out before dawn and stay 'til after dark a few times and get some incredible shots of your trip.

13. Break rules. Learn all of the photography rules you can find, then intentionally break them at times. To increase your flexibility and range of artistic expression, assign yourself homework to break one rule as much as you can for a period of time (perhaps until you fill one memory card), then break another rule. Shoot a variety of subjects while you make your horizon diagonal. Hand hold the camera during long exposures. Take long exposures of moving people. Take portraits of people with a wide angle lens. Just when you've mastered the art of being obsessive about everything you need to do to get a shot "right," see if you can break the narrow-minded control that that mindset and approach may have over you. You don't have to throw your knowledge and technique away, but take creative control over your approach. Get in the habit of throwing something creative and experimental, a "throw away" shot, into nearly all of your shooting sequences and even if only 10% of those efforts pan out, your results may get a lot more interesting.

14. Join a local camera club. Look on Meetup.com for photographers in your area who plan regular outings and photo shoots. It'll get you out shooting more and your exposure to other photographers will give you new ideas and skills.

15. Enter photo contests. Even if you're not the competitive type, having a particular theme to shoot for can expand your range of skills and experience. Competing with other photographers can motivate you to not only optimize your exposure and postprocessing adjustments such as contrast, color and sharpness, it can inspire you to edit the same image several times, potentially using different tools, enabling you to learn new image production skills along the way.

16. Don't get too hung up on reality, but don't distract your audience either. Do you want to produce art, or simply produce a copy of what's present? If all you do is record reality, then you as an artist add little to the result. Someone could simply nail a high resolution camera to a tree or to a doorjamb of the room and you're unnecessary and obsolete. On the other hand if you capture a scene but manipulate it so the result best conveys the emotion you felt at the time, then your involvement in the process was the key to its outcome and success. This is why the definition of "art" not only includes but requires human intervention. It is possible to go too far, to have your process distract the viewer from the subject you're featuring and the story you're trying to tell.  Using HDR software is one example where many people fail to further adjust the output from that software, and doing so often let the process speak louder than the subject in their results.  What's the alternative?  Consider Ansel Adams. His images were often the result of a dozen hours or more of darkroom manipulation. The beauty of his images was that they were dramatic and elicited emotion, entirely plausible and realistic, while not necessarily being true to the original scene.

Obviously each of these subjects deserves a fair amount of discussion and practice, but this list may provide you with some interesting starting points.

Wednesday, July 23, 2008

Hyperfocal Landscape Photography: Maximize Your DOF!


Cannon Beach, originally uploaded by Jeff Sullivan.

To get a photo sharp from way close to infinity, just focus on the hyperfocal point for your camera, f stop, and degree of zoom (focal length). You can see from the charts here that at f/22 you can reasonably expect to have a photo sharp from least 2 feet to infinity!:
http://www.naturephotographers.net/articles0307/rb0307-1.html

For a link to an Excel spreadsheet you can print showing DOF range for a given camera with various settings:
http://ronbigelow.com/articles/depth-of-field-1/depth-of-field-1.htm

You can fake it by simply pointing your camera at something in the foreground with autofocus on, then after it focuses, switch off the autofocus. Then reframe on what you want to shoot, and let the camera re-acquire a reasonable exposure for that image you want to capture (but it shouldn't destroy the focus you just set).

I've been doing this with DSLRs like Canon XT/XTi/40D, and after I reframe the shot I often hold a graduated neutral density filter in front of the lens and have the camera set on self timer to take 3 exposures (Auto Exposure Bracketing). I simply have to avoid bumping the lens focus manual ring (or I could use masking tape to temporarily keep it set in one place, as I do for night shots once I achieve a good distant focus for star trails).

With a point and shoot camera that doesn't have manual focus, you might have to hold shutter button halfway while you reframe so it holds the close focus point, and you may need to exposure compensate to darken the photo a stop or two so it doesn't emphasize the foreground and overexpose the sky (or just do it on a tripod and take 3 bracketed exposures, which can be averaged in the free trial version of Photomatix).

It's a lot easier than it probably sounds... just focus close, reframe, shoot!


The effect is most dramatic when you use your widest lens setting, since you can see what's at your feet plus all the way out to the distant horizon. It's even better if you put the camera low to the ground (tripod on its lowest setting) since that emphasizes what's right there at your feet, while including as much as possible out on the horizon and in the distant sky.

If you use a compact point-and-shoot camera, it probably doesn't have an aperture setting as small as f/22. Don't worry... just use your camera's smallest lens aperture setting, even if it's f/8 or larger. It turns out that due to physics and geometry, smaller cameras with smaller sensors have much more depth of field for a given aperture setting, so you're probably getting the equivalent of f/22 on a 35mm camera from your camera's setting of f/8. Check the hyperfocal distance charts for similar compact cameras, or just set your camera to its smallest aperture and try a few shots out to see how much DOF it can deliver.

One last note: since small apertures let in less light, you may want to have your camera on a tripod in case it uses a long exposure to compensate for the small aperture (especially at sunset or sunrise when light is lower anyway). I also bump up my ISO setting to at least ISO 200 to keep exposure time reasonable.

Try it out. You may be pleasantly surprised at the enlargement quality results that your camera can produce with just a little attention paid to where in the scene you allow it to focus.

Wednesday, December 26, 2007

Tame HDR to Produce More Realistic Images


For about a year now I’ve been bracketing exposure on most shots so I have the option of using high dynamic range (HDR) software to increase highlight and shadow detail in my shots.

As noted in this article at NatureScapes.net, digital cameras can capture a range of about 8 stops of light, while film cameras cover about eleven, and your eye covers 14, while an actual outdoor scene may cover 17. HDR software can help you restore some of that range of light and color that your film camera could capture, or that your eye might see.

Many people are now experimenting with or using HDR software, but it can be difficult to produce natural-looking results. By now the majority of my images on this site have some degree of HDR postprocessing involved. In the interest of timely posting, many are first pass edits that I'm not fully satisfied with or done fien tuning yet, but you can decide for yourself whether or not I'm on the right track and my experience might offer some value for you.

Here are some techniques and tricks I've learned to better control my HDR results in an attempt to produce more natural results. I consider this to be a list of basic to intermediate tips. I'm working on a list of more advanced advice on tips and tradeoffs to consider when handling some of your more challenging shooting and postprocessing situations.

Shoot RAW and work only from file formats that preserve maximum tonality data
- Compared to JPEG which has 8 bits of color information, my RAW files have 12 bits, and the extra 4 bits provide 16X more shades of each primary color. In simple terms the HDR software works with 4096 levels of each color instead of 256. The difference can be very noticeable in the results, especially in areas with subtle shading such as blue sky and orange sunsets. Working with JPEG files frankly produced crappy results for many of my shots. Some new cameras just starting to ship now produce RAW files with 14 bit color depth, so the HDR software will have over 8000 levels of each primary color to work with in RAW files instead of 256 in JPEG.

Consider your brightest and darkest shots from any HDR sequence. Using JPEG you're settling for 256 color shades instead of 4096 in 12 bit RAW, dramatically reducing subtle shades by a factor of 16X in exactly those darkest and lightest areas that you're trying to salvage. Assuming 2 stop spacing of shots, perhaps the results where I've noticed a clear difference occurred with colors and brightness values occurring in the 4 ev stops beyond all of the other exposures (the more detailed color data two stops above and two stops below all other shots, no matter what total range you're covering).

- RAW also enables you to change the white balance setting. Want to better preserve the color in your sunset? If your first HDR run on a shot reduces the color too much, try running HDR processing again using the shade or cloudy white balance setting for a warmer (more orange/yellow) tone. You don’t have that option, and can’t achieve the same results, working from JPEG files.

- As noted by the NatureScapes.net article:
Further, the camera applies a tone curve, compressing shadow tones in order to favor highlights. Since I personally find that shadow tones contribute a lot to my HDR work, I would not like to sacrifice them. Finally, introducing JPEG compression artifacts (however slight) into the HDR process may degrade image quality.
I understand there are arguments in favor of shooting JPEG. Typically the benefits raised are to get more continuous frames, more storage capacity, and potentially minimize subsequent workflow effort in RAW conversion. However, in my opinion, these factors are not particularly relevant for HDR work, especially landscape photography as discussed here.


- If you ever intend to "go pro" and submit to stock photography agencies, you'll be happy that you saved the original 16 bit TIFF output from your HDR runs (retaining your full 12 or 14 bit RAW quality, further expanded via HDR into the 16 bit TIFF color space), and don't have to re-run HDR interactively on thousands of archived RAW files to retain value from your shots. (I'm not talking about "microstock" agencies, which are fine with you spending hours to produce and manage high quality JPEG images that can be sold for pennies for online work.)

Use a Tripod and Use Auto Exposure Bracketing
- The less you touch your camera, the more likely your shots will overlay well and produce a sharp image. HDR software such as Photomatix may have the functionality to attempt to get misaligned shots to register well, but don’t count on it; it seems almost as likely to further misalign your shots. Having the camera take the shots as fast as possible also reduces any movement within the scene (leaves, clouds, etc.) that might turn into distracting ghost images in the result... better to prevent the problem and spend any postprocessing time doing something creative rather than trying to repair or salvage a shot with motion artifacts.

Use Interactive Mode, not Batch
- The default settings for Photomatix software for example seem to desaturate and overexpose many images and leave them with unrealistic halos of light around dark objects. HDR processing can reduce noise in some cases, enhance it in others. If you care about the quality of your results, all of these challenges are best faced in interactive mode.

Tame Halos: Set Light Smoothing to High or Very High
- This is your #1 tool to fight distracting light halos that may flag your results as HDR output, what some people might refer to as "overcooked." I set it "very high" at first, then back off a notch or two to see how much HDR the scene can handle.

Tame Noise: Adjust Micro Smoothing
- On some sequences HDR can cancel out noise, for others it might interpret severe noise as valid data and enhance it! Increase the Micro Smoothing setting to smooth out HDR-enhanced noise.

Restore Color: Postprocess in Photoshop or Photoshop Elements
- Since your HDR software shifted light intensities and color tones, something as simple as Auto Contrast and/or Auto Color Correction can make a lot of difference when trying to restore natural-looking lighting and color. Noise reduction can be needed too.

Restore a Natural Look: Layer and Blend HDR Result with a Single Exposure
- Sometimes my best results with HDR software are not acceptable, but neither are my results trying my best to balance the exposure and color in one of my single exposures for the same shot. Consider blending both your best single edit in with your HDR result! The single edit will most likely have better color and shading and the HDR result will have more shadow and highlight detail. A 50/50 or 60/40 blend may still not be a perfect result, but it may be better than either of the two results before you blended them!

I'd be curious to know what other techniques people have found useful, specifically when their intention is to create realistic-looking results.

If you decide to buy Photomatix, you can get a 15% discount by using the coupon code JeffSullivan when you by it from its publisher HDRsoft: http://www.hdrsoft.com/order.php

(I'm still tuning the focus of this site. If you like my inclusion of experience and technique tips in this blog, drop me a line to let me know in my guestbook. Thanks!)

Monday, November 26, 2007

Up In Smoke

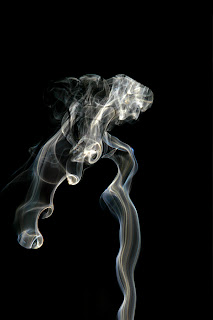
My first attempt at editing a couple of smoke shots together, using layers and basic Photoshop Elements tools like dodge, burn, eraser.

To get this result I shot incense smoke from about 3 feet away. I used an external flash mounted on my camera (head rotated to mainly bounced off a wall to the side), manually set f/8 and 1/200 sec. (ISO 100), and had a dark background (black $2 disposable table cloth from a party store) a few feet behind.

I then edited a couple of shots together, using layers and basic Photoshop Elements tools like dodge, burn, eraser. The blue was in the smoke but I saturated it.

For more examples and technique ideas such as false coloring and mirroring, see: www.flickr.com/groups/artsmoke/

Thursday, October 04, 2007

Fall Colors: Selecting a Destination

Here I am packing for my next photography trip. My ex scheduled a court date for exactly the middle of my planned trip. What a coincidence.

I'm examining the Forest Service's Rocky Mountain Region 2007 Fall Color Report to see where I should go with the 2 weeks I'll now have instead of the 4-6 I was counting on:

NEARLY ALL THE FORESTS WHO SENT IN A REPORT THIS WEEK AGREE THE FALL COLORS WILL BE REACHING THEIR PEAK COLOR BETWEEN THIS WEEKEND, SEPTEMBER 29th & 30th, AND THE FOLLOWING WEEKEND, OCTOBER 6th & 7th.

With favorable weather conditions, the color should continue to intensify during the next 2 - 3 weeks. With even a little more luck from the weather, there could be good color into the last week of October in some areas.


I'd better get moving!

As I was dropping off some legal documents to keep me out of hot water while I'm on the road, The Doors were playing, and Jim Morrison seemed to be urging me out the door.

Ah keep your eyes on the road,
Your hands upon the wheel.
Keep your eyes on the road
Your hands upon the wheel.
Yeah, were going to the roadhouse,
Gonna have a real good-time.

...
The futures uncertain
And the end is always near.

Let it roll, baby, roll.
Let it roll, all night long.

Sunday, September 30, 2007

Shoot Fall Colors Like a Pro

Here are some of the things that I do to capture nice Fall shots:

1. If the sun is shining, use a circular polarizer and carefully orient it to cut glare reflecting off of the leaves. It'll expand the color in your shot, improve saturation, and enable a more accurate and appropriate exposure. It can make the sky a deep shade of blue as well, which looks good alongside the bright leaves.

2. Shoot close/detail shots early to avoid wind, especially if you're shooting aspen trees.

3. Shoot in RAW format if possible to enable you to adjust white balance of your shots towards warm as appropriate to reproduce the warm yellow, orange and red leaf tones you experience.

4. Use a small aperture such as f/22 for maximum depth of field.

5. Try some shots of backlit leaves, as they can be very intense in color.

6. Pick some westward and eastward views and plan ahead to catch sunrise or sunset over colorful trees.

7. Pick up some of the most colorful and interesting leaves you find and put them in your pocket. Arrange them as a still life shot on a rock, or when you come to an interesting object (stump, rock) or stream scene, scatter them around to enhance the color in the shot. In a pool in a large stream or river, sometimes you can find a circulating eddy to throw leaves into to take long exposures with the leaves swirling around.

8. Use a tripod.

9. Get into a dense stand of trees and shoot straight up towards the sky.

10. Try some 10-20 minute night shots under a full moon. You'll get Fall colros shots with star trails!

11. Shoot a lot of Automatic Exposure Bracketing sequences with 1 1/3 stop to 2 stop spacing. Even if you're not using HDR postprocessing software yet, you can come back 1-2 years from now and benefit later from your investment of time shooting today.

Thursday, August 30, 2007

Lessons Learned: Photographing the Lunar Eclipse

For the August 28 lunar eclipse I decided to go shoot by Mono Lake, where there would be no light pollution and at an elevation of about 7000 feet there would be minimal atmospheric interference. I spent the previous night in Yosemite Valley and travelled to the South Tufa access point at Mono Lake to spend the night of the eclipse. To plan for the eclipse, here are some links that I used.

Lunar Eclipse Photo Examples and Shooting Advice:
http://www.mreclipse.com/LEphoto/LEphoto.html

Aug 28 Lunar Eclipse Phases & Times:
http://sunearth.gsfc.nasa.gov/eclipse/LEmono/TLE2007Aug28/TLE2007Aug28.html

I really liked the example of a wide angle lunar eclipse sequence in a particular setting, so I set up one camera to leave with one wide perspective, and I used another to capture zoomed shots of the moon at various phases of the eclipse.

I did a fair amount of exposure bracketing, but I had some focusing problems during the darker phases of the eclipse. In my case I had added a 2X teleconverter to my lense which forced manual focus, so I assumed that I simply wasn't focusing accurately enough. Examining the shots on my computer the next day, the stars revealed that the real culprit turned out to be the rotation of the earth. My 70-200mm lens doubled via a 2X teleconverter to 400mm is equivalent to 640mm on a 35mm camera, so in the process of magnifiying the detail of the moon I was magnifying the motion of the moon as well. With the moon 10,000 times less bright during the eclipse, about a 15 stop shift darker, and the 2X teleconverter also cutting my lens's widest aperture down 2 stops from f/4 to f/8.0, I could focus on the moon sharply at any given instant, but the exposure times were simply too long as both the moon moved and my position moved (the surface of the earth rotates at over 1000 miles/hour). As I examine the shots in more detail it'll be interesting to see at what exposure time the motion becomes too great at that level of zoom.

Update: Using the "500 Rule" to determine an approximate maximum exposure before the stars and moon start to "drag", divide 500 by the effective focal length of 640 mm and you get 500/640 = 0.78.  So any exposure time under 0.8 seconds or so will produce a photo without that apparent motion blur.

A different issue I've found related to moon shots and image stabilization is that when I bracketed I wanted to use Photomatix HDR software to combine multiple exposures to really bring out the moon's detail. Unfortunately the IS system seemed to re-acquire a new lock on the moon in between shots, which moves each shot slightly and destroys the alignment of the shots relative to each other. Normally HDR software can attempt to restore alignment across multiple shots, but the information in each shot is so different that there doesn't seem to be enough information for the software to use to perform alignment automatically. I guess I'll have to use Photoshop skills to superimpose, align, and blend multiple shots.

My biggest challenge however turned out to be one that I had anticipated: battery power. What I hadn't anticipated was shooting in yosmite all day then catching a nice sunset in the Mammoth Lakes area before heading over to Mono Lake. I started the night with neither of my cameras fully charged, and having to do a little battery shuffling and charging during the night cost me a couple of key shots from the sequence I wanted to complete. Lesson learned.

The still partially eclipsed moon set over the crest of the Sierras near 13,000 foot Mt. Dana, I enjoyed a nice sunrise at Mono Lake, then I spent another day shooting Yosemite under some nice, dramatic clouds. I started getting a little tired after 36 straight hours of photography, but what a great trip!

With clouds over Yosemite and water levels low and calm on the Merced River, I had a particularly productive time there. Here are a few of my favorite shots.

The turnout opposite Bridalveil Falls is a great place to stop right before sunset as the softening golden light of the setting sun brings out the color in the valley's granite. Bridalveil Falls and the Merced River in Yosemite Valley are at extremely low levels following a winter season of low snowfall.

I wasn't sure if the reflection was going to be strong enough, but as it turned out I really like how the rocky bottom of the river shows through in the darker areas of the reflection. Some people think that all you have to do in landscape photography si show and trigger the shutter, but in this case a circular polarizer at partial strength, a graduated neutral density filter hand-held in front, auto exposure bracketing 3 shots plus HDR processing and Photoshop color adjustment were all needed to create this result

I go to Yosemite a lot, but this was my first visit with a really wide lense. Being that deep in a valley, the extra coverage sure helps, especially if you're trying to double it the Valley's landmarks with a reflection!

I call this photo "PapaBearazzi." Fortunately this bear had plenty of ripe apples to keep him full, but at night the bears roam the campgrounds, like giant dogs, looking for dropped table scraps. I've rarely seen bears wandering around during the day in Yosemite, but on this day I saw 2, and the night before my father stepped out of his tent and almost tripped over one!

Wednesday, November 01, 2006

How To Plan for Great Full Moon Rise and Set Shots!


As a general rule of thumb the full moon rises at sunset and sets at sunrise. This is very convenient because you can get the moon illuminated by the orange glow of the sun, with its color and size magnified by the atmosphere, low enough to place it near some of your favorite subjects on the ground (such as reflected in your favorite lake or fountain). Turn in any other direction, and you also have the sunrise/sunset itself to shoot, as well as subjects side-lit by the warm, low-angled light!

In practice however the actual moon set and rise times, and how they relate to sunset and sunrise, will depend upon the time of year, your position on the earth, and your position towards the east or west side of your time zone. Fortunately you can simply look up the time for your town. I'll get to that in a moment.

First I'd like to point out that you often don't want to shoot on the exact full moon date. The moon's brightness can be too great unless the sun is still lighting the ground with enough intensity. Fortunately the moon rise and set times move a little later each day, so a day or two before the "official" full moon it will be rising while the foreground is still lit, or if you have mountains on the horizon it will be high enough to clear than the horizon while the sun sets. Similarly, the day or two after "full moon" is often best for dawn moon set shots, since after the full moon date it remains in the sky above the horizon as the sun rises and lights the scene.

For example, in November where I live the sun is rising around 7am and setting around 4:46 (it changes a minute or so each day), so the November 24 moon rise at 4:24pm should be lit by the setting sun. Also that morning's moon set at 7:15am will be right after the rising sun has started to light up the landscape around 7am.

In the past I used the U.S. Naval Observatory to produce charts of sun and moon rise and set times.  Here are examples of the rise and set times (in 24 hour military time) for October, November and December, with the link you can use to look up times for your location (assuming no mountains on your horizon of course):

http://aa.usno.navy.mil/

SACRAMENTO, CALIFORNIA
Rise and Set for the Moon for 2007
Pacific Standard Time

Oct..........Nov..........Dec......
Rise Set Rise Set Rise Set
h m h m h m h m h m h m
24 1615 0432 1642 0719 1738 0818
25 1645 0550 1742 0835 1853 0906
26 1721 0710 1851 0941 2005 0943
27 1806 0831 2004 1034 2114 1014
28 1900 0949 2117 1115 2219 1039

If you have a calendar in your cell phone or PDA you can program rise and set times in, even months ahead of time, and don't forget to add an alarm 45 to 60 minutes ahead of time to remind you to get to the site 30-45 minutes early to plan and set up for your shots.

Vane AttemptToday I mainly use a free app on my PC, "The Photographer's Ephemeris" (TPE) to plan for the moon position in more detail on a +Google Earth satellite image:

Anticipating Sun and Moon Alignments

http://activesole.blogspot.com/2010/03/anticipating-sun-and-moon-position.html

Using TPE you can check the moon's altitude in the sky at any moment, so with a little extra math to check the geometry, you can set up your camera in advance to line the moon up with just about any land-based object.

As an example, here's the moon during a lunar eclipse, which I planned to capture as it passed right through the tip of the Transamerica Building in San Francisco.  Since I was shooting images to create a time-lapse video, I had to put the tripod in the exact right place at least 15 - 20 minutes ahead of time:


It's amazing the tools photographers have at their fingertips these days!

Shooting tips:

Set your camera on manual focus and focus it a little behind the closest object you want in focus (depth of field only comes a short way forward, longer towards the distance). Use a small aperture if you have a tripod and are taking a wide shot, but if the exposure gets long and your zoomed in on something, remember that the moon is constantly moving and it will blur, so consider widening to f/8 or more (best to bracket f-stop settings and get the shot than to wish the next day that you had done something different).

The lighting will change rapidly in the course of a few minutes, so bracket your exposures ligher and darker, and consider using your camera's exposure compensation to darken most shots (you can combine it with automated exposure bracketing in many cameras) so the moon won't be a blurry, washed out mess. Plan ahead to have a foreground subject, a scene that the moon and possibly sunrise/sunset simply adds another dimension to (the moon itself has been done once or twice before). If the exposure range is too great between the bright moon and your darker foreground subjects, you can expose differently for the two and combine the shots later. You used to have to spend a lot of time in Photoshop to combine differently exposed shots, but now specialized "HDR" software will do the work for you automatically (best to use 2 or 3 exposures AT LEAST 1.5 to 2 stops apart in exposure from each other). See my experience tip on HDR and download trial Photomatix software at HRDsoft.com, but you can do that later as long as you bracket shots and use a steady tripod (and best to use automated exposure bracketing) so multiple exposures will line up and can be automatically processed.  Search this blog for "HDR" for more information on the technique.  If you decide to buy Photomatix, you can get a 15% discount by using the coupon code JeffSullivan when you by it from its publisher HDRsoft: http://www.hdrsoft.com/order.php

Consider trying some shots using fill flash if your foreground subject is within the appropriate range (about 8-20 feet for most cameras). Dawn and dusk are also prime times for using graduated neutral density filters to darken the bright sky and bring out what's on the ground, enabling the camera to see what our eyes can see onsite.

If you'll be travelling during the prime full moon days, the equator is 25,000 miles in diameter and completes a revolution in 24 hours, so it's moving at over 1000 miles/hour, so a rough estimate would be that every 100 miles you move east will be a 6 minute earlier change to the rise and set times, and 100 miles west will be 6 minutes later... more or less.

You don't want to fumble around in the dark, so don't forget your tripod, flashlight, jacket, hat and gloves, bug repellent in the summer, and maybe a folding chair for long moonlit night or star trail shots.

Now go look up the moon rise and set times for your area, and plan ahead to go nail some great shots in the 3-5 great shooting days that the moon gives us each month!

Saturday, July 29, 2006

Polarizing Filters: Your #1 Outdoor Ally

Polarizing filters are fairly well known for being able to darken a blue sky and increase contrast with white clouds in a scene, for reducing glare and reflections (off of water, cars and so forth), and for cutting haze and bringing out more subtle shades and detail in clouds.

What some people don't know is that they can improve the color and saturation in fall color photos by reducing glare and reflection off of the leaves, improve detail in outdoor photos with a lot of sandstone or granite in them, and improve the color saturation of other objects that can reflect light shot in the sun (such as hot air balloons, buildings, even insects). In addition, reducing glare on peoples' skin may save some of those shots that were marginal for you in the past because the camera closed down another stop or two and faces came out too dark.

The first key thing to pay attention to is that you buy a circular polarizer, not a linear polarizer. A circular polarizer should be compatible with your camera's autofocus system.

When you're using the polarizer, you can rotate it to increase or reduce its effects on the photo. For even more control, there's a mark on the rim of the filter and the light is cut most in that orientation (from that direction). For example, if you point that mark straight up, you can virtually eliminate a reflection on a reflective surface such as water. If you point that mark straight sideways, the reflection on water in front of you will be preserved, but glare on objects from light coming from the side of you (a rising or setting sun) will be dramatically reduced.

The easiest way to use a polarizing filter is to simply try to point that mark at the sun (or other main light source), then perhaps make a minor adjustment to affect any desirable reflections in the photo a little more or less.

A slightly more advanced application might be to try one for shots involving clouds, whitewater, steam, or snow, to see if you can get more finely-tuned shades of white and gray and more detail in your photo once you reduce the glare. You may be amazed at what polarizers can do for clouds. You may have to bracket exposures and try various angles on the polarizer to get just the right combination to bring out the subtle detail, and you may not be able to tell any difference among those shots until you get back home to your PC.

The circular polarizers I've bought tend to be in the $20-30 range for a fairly small and common filter size, but they do get more expensive with size and they cut the light coming into the camera about 2 stops. Two stops usually isn't a big deal in sunlight, which is when you most often need these filters. I don't trust the cheapest, I tend go with a reasonably priced option among brand names.

On a clear, blue sky day, polarizers tend to have the most applications in bright light and in mid range shots. Wide angle lenses cover a lot of the sky and the polarization of the sky varies across the shot, resulting in the filter's effect being applied unevenly and the color and darkness insonsistent across the shot.

I hope you can see that circular polarizers can have a range of applications and don't have to cost a lot. They tend to be the second filter that nearly all shops recommend that you buy, right after a UV or Haze filter to protect the front surface of your lens.

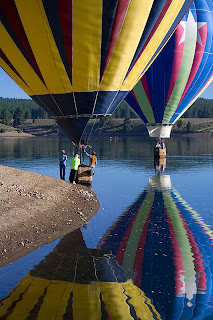
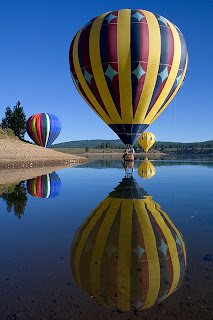
In these examples the zoomed shot was taken with the polarizer pointing sideways towards the sun, cutting glare on the balloons and enabling a more even exposure of them without killing the reflection. In the second, wider example the filter is rotated further off of horizontal and the polarization of the light reflected off of the lake varies, enabling the texture of the bottom of the lake to show through.

Options include thin polarizers for wide angle lenses, which are less likely to cause vignetting the corners of in your shots. Some still have front filter threads, but many wide angle filters require a special snap-on filter cover. Some polarizers have extra coatings to reduce flare and ghosting, which may be particularly worthwhile if you expect to have the sun in some of your shots.

You can also use a polarizer as a neutral way to cut light (as a neutral density filter), to enable you to artistically blur rivers and streams, waves, trees blowing, or boats rocking.