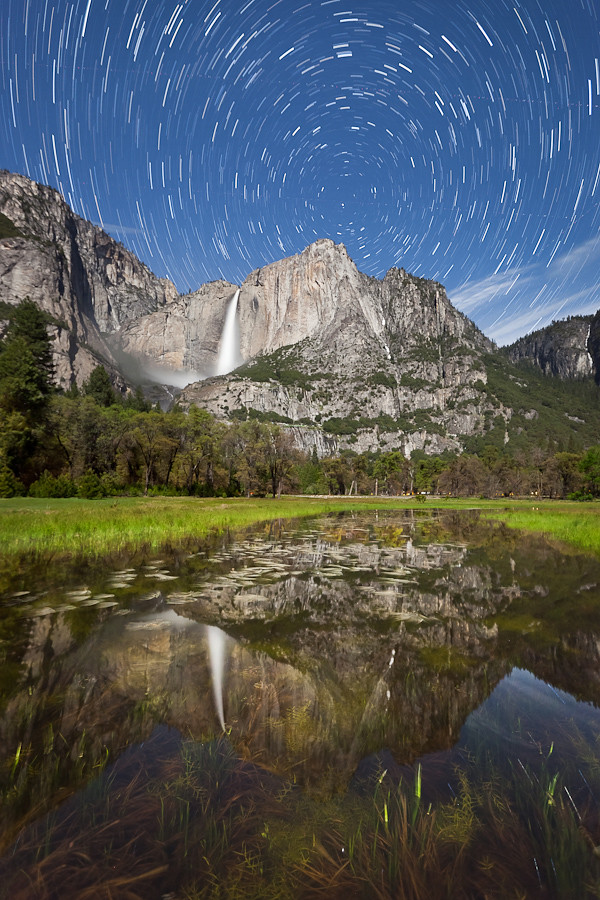
 The Basics
With today's digital cameras it is surprisingly easy to create star trails images. At the highest level, all you do is run a sequence of night star shots through a star trails program and enjoy the result. As is often the case, the challenges come in the details.

You'll need to capture images covering 30 to 60 minutes or more. A sturdy tripod is essential. You can trigger exposures manually, but that's tedious and not fun to do for an hour at night. Ideally you'll have a remote trigger that can lock down to fire off sequential shots, or even better, an intervalometer which takes shots at certain intervals which you define.
You'll need to focus your lens on an object at close to infinity, and leave the focus mode set to manual so it won't hunt for focus in the dark. The focus ring of your lens probably continues past that point to compensate for differences as temperatures fluctuate, so focus during daylight on a distant object and note where this is, or if your lens has continuous focus ring with no visible scale, focus your camera during the day, switch it into manual, and carefully tape the focus ring with removable painter's masking tape or gaffer's tape.
You'll want to take sequential shots close together so the star trails to be continuous, so turn off your camera's long exposure noise reduction.
You'll also want a consistent exposure, so use your camera in Manual exposure mode. Cameras have slightly different sensitivity to light, and the moon brightness (phase) and local light pollution can affect your exposure from night to night, so you'll need to run some tests to determine what settings to use for your individual shots.
 |
| Full moon exposure: 15 seconds f/4, ISO 3200 |
Under a bright full moon in clear skies I might start at f/4 at ISO 3200 for 15 seconds. If you'd prefer to drop your ISO to 1600, simple double the shutter speed for the same overall exposure. On a darker night you can choose a wider aperture, higher ISO, or increase your exposure time using an external intervalometer. Take lighter and darker shots to ensure that you've identified an exposure which isn't too bright or too dark, then set up your camera to capture a sequence of images at the optimal settings. The main exposure of 15 seconds enables me to quickly use Automatic Exposure Bracketing to take lighter and darker exposures at 30 and 8 seconds to verify the best exposure setting, then I can pick an equivalent exposure at the camera's longest internally available setting (currently 30 seconds on most cameras).
Once you have the basic exposure figured out, take that exposure over and over until you reach 30 to 45 minutes or more total. Leave as little time as possible between shots.
For this example I used about 80 shots of 30 seconds each, covering 40 minutes. I used the free StarStaX software (www.StarStaX.net) in "lighten" mode, where the lightest pixels are kept as images are merged, creating the trails as the stars move from frame to frame.
Intermediate Considerations
In very long exposures, digital camera sensors can produce random spots of bright single pixels referred to as "hot pixels". If you're shooting on a relatively warm night, about 60 to 70 degrees or warmer, with many cameras you may start to see more hot pixels the warmer it gets. StarStax can help you eliminate them. At the end of your star trails sequence, put your lens cap on and take a few more images of the all-black capped lens at the same settings you've been using. The only data in the image should be the hot pixels. StarStaX allows you to identify these images so it can automatically eliminate those hot pixels.
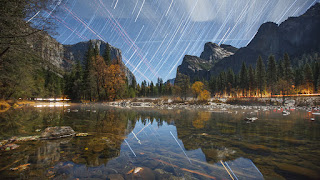 |
| Yosemite is under a major flight path for airplanes |
In the old film days, star trails were accomplished by leaving a camera shutter open for one long exposure, even for many hours. Some purists believe that everything should be captured in one exposure. Since the photographic industry honors the achievements and traditions established over many decades, photographers who learned on film still dominate the industry in many ways. Change is slow. So you might consider a preference for long-held film best practices to be "traditionalist" thinking as well. There's nothing inherently wrong with this approach, but it's not inherently right or better either, it's just a particular bias that people are welcome to hold if they like. Unfortunately, few places these days are so unpopulated and uncrowded that you can completely avoid interruptions such as passing headlights or other photographers' flashlights. So in many cases a single long exposure is likely to be interrupted by a wide range of lights, from airplanes passing overhead to cars or nearby flashlights. A general approach to be able to edit these out is to capture many exposures, and edit them out frame by frame.
When editing airplane trails out of a starry sky, it is easiest to edit out short ones. Local light pollution on your foreground, or on a distant road, can be quickly and easily taken out as described below, provided that you have enough exposures to provide images with those areas not polluted with lights.
Advanced Considerations
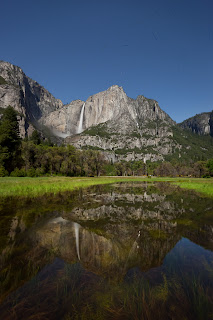 |
| Darken mode |
Unfortunately in Yosemite Valley, the cars driving by create lasting light trails, and headlights spill onto nearby landscape features as well, making them harder to manually edit out than narrow, linear airplane trails. To remove this sort of broad local light pollution, there's also a "darken" mode in StarStaX, which keeps the darkest pixels in the sequence of images that you send it, eliminating the effects and trails of the car headlights.
This also eliminates the star trails, but by using layers in Photoshop and blending that center portion of the darkened sequence into the lightened star trails sequence to get a star trails image without the car lights.
Once you decide to use separate images, you might question whether or not to use 30 second exposures, since that tends to also require high ISO, which many photographers associate with noise, or and very wide apertures, which many photographers associate with lower depth of field and/or softness in focus. These are valid considerations and if you have an intervalometer that can handle multiple minute exposures, there's no harm in testing different approaches. But the image stacking process in StarStaX eliminates most noise, so ISO isn't as much of a concern as many photographers tend to assume (at least not for noise).
 |
| One sequence of 30-second images |
Consider also that you are not nocturnal, and you're far more likely to make mistakes late at night, so do you really want to complicate a process that you'll enter into when somewhat mentally impaired? You can set up everything when you're alert during the day or evening, then start the image capture later. I've done that, then started the intervalometers that I had programmed on two cameras for night shooting, only to find the next morning that I had 1200 exposures of the lens caps that I had neglected to take off. There's a lot to be said for an easy, repeatable, and infinitely simple process with maximum applicability across as many situations as possible! I can set 30 seconds in camera, I can have a one second interval between shots. Done. It's hard to mess that up.
On some external intervalometers I can lock the shutter release button down to have zero seconds between shots if the camera is set to continuous shooting mode, but there are two new variables introduced, the shooting mode and the intervalometer's features, which will eventually cause problems on a different combinations camera and intervalometer. Keep it simple, or pursue every last setting for ultimate quality if you wish, but understand that increasing complexity will increase your failure rate. Time and travel expenses are often the most valuable commodities for a landscape photographer, and long exposures and our desire to sleep make night shooting time even more precious. How many opportunities do you want to miss, when your itinerary doesn't allow staying an extra night to re-take a shot?
There are other subtle considerations on the capture, post-processing, and output/printing portions of the process, but this will get you off to a great start.
So start simple, and gradually try more ambitious shots or more complicated techniques as you like, but go give star trails a try!
---
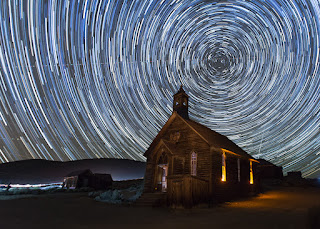 |
| Join us to learn night photography in Bodie! |
If you want a little extra help, I lead one night photography workshops in the Wild West "ghost town" of
Bodie. For more practice, you can join me for a longer tour of
Yosemite,
Death Valley or the
Eastern Sierra.
In many cases I offer a visit to Bodie adjacent to one of those longer workshops, so you can shoot in Bodie to start or end your trip.
If you're looking for dark places to try night photography on your own, consider anywhere away from metropolitan areas. I identify over 300 great locations for landscape photography in my new 320-page book, "
Photographing California Vol. 2 - South", pictured below.
For night photography in California, focus on locations in the Southern California desert from Anza-Borrego State Park through Joshua Tree National Park and Mojave Preserve to Death Valley National Park, or on the Eastern Sierra region.


