Showing posts with label HD Video. Show all posts

Wednesday, December 17, 2014

Geminid Meteor Shower 2014 in HD


Time-lapse video footage from the Geminid meteor shower on the nights of December 13 and 14, 2014. Shot at Topaz Lake in the Eastern Sierra region, on the California-Nevada border.

Here's a description of the Geminid meteor shower from NASA:

"Geminids are pieces of debris from an object called 3200 Phaethon. Long thought to be an asteroid, Phaethon is now classified as an extinct comet. Basically it is the rocky skeleton of a comet that lost its ice after too many close encounters with the sun. Earth runs into a stream of debris from 3200 Phaethon every year in mid-December, causing meteors to fly from the constellation Gemini. When the Geminids first appeared in the early 19th century, shortly before the U.S. Civil War, the shower was weak and attracted little attention. There was no hint that it would ever become a major display."

Composite photos showing multiple 2014 Geminid meteors
I'll be teaching photographers how to capture meteor showers in a photography workshop during the Geminid meteor shower in Death Valley in December 2015: www.JeffSullivanPhotography.com


#Geminids #meteorshower #science #breakingnews #astronomy +Death Valley Workshops 

Monday, November 17, 2014

Leonid Meteor Shower: Timelapse HD Video


You should see two big ones top center, then a lot of little ones down near the horizon after that.

Assembled from 224 30 second photos taken last night from 1-3am in the Eastern Sierra, California, during the Leonid meteor shower in 2009.

All I can say now in 2014 is wow, my technique has progressed a lot since 2009!

Tuesday, May 28, 2013

Venus, Jupiter, Mercury Conjunction (1080p, 30fps)


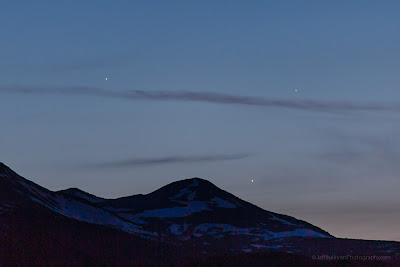
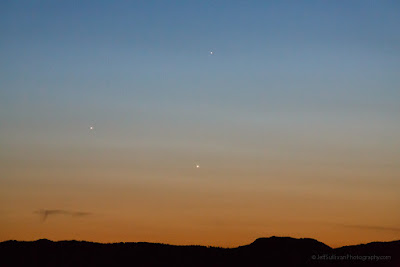
The planets Jupiter, Venus and Mercury are close together in the evening sky this week, so every night I've been trying to capture them together on the horizon in the twilight hours before they set. The first night the clouds were too thick. The second night I was shooting sunset in high winds at Mono Lake with the Sierra Nevada as a high western horizon, so I caught a few pictures of the planets, but they set too quickly to capture a time-lapse video. The third night was just right, relatively clear to the west, I was in a high shooting position with an apparent horizon lower than my position (less than 0 degrees elevation), and fortunately that was Sunday May 16, the night when they'd be closest together, forming a tight triangle.

There was still wind to deal with so I changed position a few times to minimize it. I could only use one camera because I had loaned my daughter one of my quick release plates the day before and it was still on her camera back home. There wasn't a lot of light and I was shooting with a 2X teleconverter on my 70-200mm lens at close to 310mm, so my aperture was limited to f/8, forcing me to bump up the ISO to minimize shutter speed in that wind. Fortunately I worked out all the trade-offs in time to capture about four hundred frames, enough to create this time-lapse video. 


Here's how my four days of effort to capture this event turned out:


Pursuing the Venus, Jupiter, Mercury conjunction on May 24, 2013.
May 24 from Lake Tahoe


Pursuing the Venus, Jupiter, Mercury conjunction on May 26, 2013. Too high of a horizon at Mono Lake!
May 25 from Mono Lake

Pursuing the Venus, Jupiter, Mercury conjunction on May 26, 2013, just right with a low horizon.
May 26 from Monitor Pass


Pursuing the Venus, Jupiter, Mercury conjunction on May 27, 2013. Too cloudy over Lake Tahoe!
May 27 from Lake Tahoe

Thursday, October 18, 2012

New Astrophotography Time-lapse Demo Reel


Considering watching or photographing the Orionid Meteor Shower this weekend?  Here's my latest footage of the Perseid, Geminid, Zeta Perseid and Arietid meteor showers to get you in the mood.

I was recently contacted by Kerstin Inga of Life Audience about the possibility of setting some of their music to some of my time-lapse footage.  I've accumulated a quantity of video over the past 4 years, and their song "While You Were Sleeping" from their *Wave and Particles* album seemed perfect for some of my astrophotography clips.  If you like the track, check out other songs from this album on iTunes: https://itunes.apple.com/gb/album/wave-particles/id427106760

If you like night photography, my 2013 workshop schedule will be announced here on my blog soon.

This is the culmination of hundreds of hours and many long night of effort from everyone involved.  YouTube likes and shares are greatly appreciated by the artists.  Thank you very much! 


Note: To best see the meteors, watch this video on YouTube, first selecting a quality of 720P HD and then making it go full screen: http://youtu.be/6YOxo7uI8ns?hd=1

Tuesday, December 13, 2011

The Geminid Meteor Shower Peaks Tonight!

The good news is that the Geminid meteor shower peaks on the nights of December 13 and 14, so tonight one of the strongest meteor showers of the year. The bad news is that the moon rising around 8 pm tonight and 9 pm tomorrow night will interfere with the visibility of the meteors. How much will it interfere? Actually I have a video of Geminid meteor shower from past year with and without the moon in the sky which can show you the difference. Make sure you're watching this in HD, and it's best watched full scree as well: You'd definitely see more meteors without the moon, so try watching before the moon rises, but if you're up in the key viewing hours between 11am and dawn, look up in the eastward sky and you might get lucky and see a decent fireball!

Monday, August 01, 2011

Create a Timelapse Video on Your Digital Camera

Lunar Moonbows in Upper Yosemite Falls from Jeff Sullivan on Vimeo.

Timelapse videos are easy to create on your DSLR. There are many software packages which will facilitate the process, some better than others, but I'll describe the simple and relatively low cost workflow that I currently use. You'll need software on your PC which can convert a sequence of JPEG files to timelapse video. I use VirtualDub (free download) to create an AVI format video, then I use MPEG Streamclip (free download) to convert the huge .AVI file to a much smaller (albeit lower quality) MPEG-4 for online use. Here's the process from shooting to finished video:

Clean your camera sensor. It is hard enough to remove dust from one image... picture having to do that 300 times. Even copying dust removal from one image to the others, the data changes over time (from shot to shot), so it really won't work well across the whole sequence. It's far, far better to remove the dust up front. Clean your camera sensor!.

Put your camera on a sturdy tripod. Install a fully charged battery and a blank, freshly-formatted memory card which can handle several hundred images.

Compose your image expecting to lose some of the vertical information if you'll convert the sequence to HD video with a narrow HD shape (16:9 aspect ratio).

Manually focus your camera and switch off automatic focus. If you forget to do this, your camera will insert delays in the sequence as it hunts for focus, making the playback jerky at best. Worst case, your camera may lose focus and you'll end up with a whole lot of blurry images.

Make some test shots to determine best exposure. If practical, set exposure manually so it won't change from shot to shot and cause flashing (flicker) as different exposures come up during playback. If the light will change a lot during shooting (sunrise and sunset), you can use automatic exposure, but then the exposure during the video is artificially stagnant, and you'll need to to "deflicker" the timelapse to reduce flashing from frame to frame when producing the video. You will learn some very interesting and important things about your DLSR in this process! When your DSLR changes the exposure up or down 1/3 stop from shot to shot, simply "fixing" the exposure during editing will not result in similar-looking images from shot to shot! Even adjacent images taken a fraction of a second apart may have different white balance, and a slight exposure change also affects contrast, color saturation, and so on. Once you've gone through the process a few times your whole approach will change and you'll try to maximize quality and consistency in-camera, not during editing.

Shoot several hundred images in a row. You can make the timing from frame to frame consistent using an Intervalometer Trigger (external timer), or you can simply hit the shutter release over and over (perhaps use the display of the prior image on the camera rear LCD as your cue to trigger the next shot and keep them at a fairly consistent rate). Remember that your finished product will be 30 frames per second, so you'll need 300 images for each 10 seconds of video. I recommend shooting in RAW format so you can adjust the exposures during editing, especially if you shoot at sunrise or sunset where the light will change over the course of your timelapse.

Read your camera's files into your editing software and crop them to the 16:9 aspect ratio of HD video. Remember that you have far more resolution in your DSLR than you need for HD video, so you can perform a "digital zoom" and focus on only a portion of your original camera image. Software strong in batch editing such as Adobe Lightroom (free trial available) will enable you to apply a consistent crop, exposure adjustments and even spot removal across the entire sequence of images. You'll also want to impose one consistent white balance across the entire sequence. Some video processing software (such as Adobe Premiere I believe) will even let you specify a starting crop and a different finishing crop, then calculate a zoom and pan across your sequence of images.

Save your files in sRGB JPEG format at 1280 x 720 resolution for video to be used on sites like YouTube or Flickr that only allow smaller 720p HD format video, or save them at 1920 x 1080 resolution for 1080p video to be uploaded to sites such as Vimeo. If you'll use the VirtualDub software, it will want you to point to the first image in the sequence then look for a sequential numbered file, so if you used automatic exposure bracketing while shooting you may be editing and saving every third file, but you can rename them sequentially so VirtualDub can order them properly.

Read the sequence into VirtualDub. It's important to notice when trying to import them that in the dialog box where you're looking for the first file to select, the file format has a drop-down menu which enables you to specify that it should look for an image sequence in JPG format.

Add filters as desired, in the order that you want them to apply. For example, Virtualdub can crop and resize larger JPEGs, perform sharpening at the new lower resolution, and you can search for and install a third party "MSU deflicker" filter to improve image consistency from frame to frame across the whole video. Check your frame rate and for maximum quality (but shorter result) change the default 10 frames per second to 30.

Save the video in AVI format. That's a very high quality format, so it may save a file of a gigabyte or more! Enjoy this high quality file on your computer (or read it into video editing software to burn it to Blue-Ray DVD).

To create smaller files for online sharing, read your .AVI file into MPEG Streamclip. Save to MPEG-4, playing with quality vs. file size tradeoffs until the results are what you want.

Upload your results to your favorite video sharing site. That's it! It takes a little more planning to pull off well and a little more time to produce the finished result, but you can produce some amazing videos.

For more information on shooting timelapse sequences, I recommend browsing the discussion forums over on www.Timescapes.org.

Note: although Adobe Lightroom has a retail list price of $300 to buy, Adobe offers a free trial.


This is an updated re-post of my November 2010 blog post since the link to the original timelapse video on Flickr appears to have broken. Instead I've posted links to videos on Vimeo:

Pfeiffer Beach Winter Sunset from Jeff Sullivan on Vimeo.

Friday, December 31, 2010

Owens Valley Rainbows (Timelapse Video)

Rainbows I found in the Owens Valley on October 5, 2010 while scouting conditions for the Fall Colors workshop. The rainbows move across the landscape as the sun moves across the sky.

Best viewed in high definition over on Flickr!

Saturday, December 25, 2010

Total Lunar Eclipse over Saguaro National Park

A massive storm was hammering the entire West Coast this lunar eclipse approached, so I decided to drive as far as I had to to get out from under the clouds. One 2000 mile round trip later, here's a timelapse video spanning several hours. During the total eclipse the moon turns very dim and red, coloring the clouds and the landscape below.


Update: The copy I uploaded here to Blogger was converted poorly to a low resolution copy, so I deleted it. For best results at the moment, watch a preview of my lunar eclipse timelapse video over on YouTube: http://youtu.be/26aXK2vg6EI.


Here's one of my still images from the lunar eclipse, captured on an old Canon 40D:

Friday, November 19, 2010

Create a Timelapse Video on Your Digital Camera

I have a lot of timelapse sequences that I haven't gotten around to processing yet, but here's one from sunrise this morning!

Timelapse videos are easy to create on your DSLR. There are many software packages which will facilitate the process, some better than others, but I'll describe the simple and relatively low cost workflow that I currently use. You'll need software on your PC which can convert a sequence of JPEG files to timelapse video. I use VirtualDub (free download) to create an AVI format video, then I use MPEG Streamclip (free download) to convert the huge .AVI file to a much smaller (albeit lower quality) MPEG-4 for online use. Here's the process from shooting to finished video:

Clean your camera sensor. It is hard enough to remove dust from one image... picture having to do that 300 times. Even copying dust removal from one image to the others, the data changes over time (from shot to shot), so it really won't work well across the whole sequence. It's far, far better to remove the dust up front. Clean your camera sensor!.

Put your camera on a sturdy tripod. Install a fully charged battery and a blank, freshly-formatted memory card which can handle several hundred images.

Compose your image expecting to lose some of the vertical information if you'll convert the sequence to HD video with a narrow HD shape (16:9 aspect ratio).

Manually focus your camera and switch off automatic focus. If you forget to do this, your camera will insert delays in the sequence as it hunts for focus, making the playback jerky at best. Worst case, your camera may lose focus and you'll end up with a whole lot of blurry images.

Make some test shots to determine best exposure. If practical, set exposure manually so it won't change from shot to shot and cause flashing (flicker) as different exposures come up during playback. If the light will change a lot during shooting (sunrise and sunset), you can use automatic exposure, but then the exposure during the video is artificially stagnant, and you'll need to to "deflicker" the timelapse to reduce flashing from frame to frame when producing the video. You will learn some very interesting and important things about your DLSR in this process! When your DSLR changes the exposure up or down 1/3 stop from shot to shot, simply "fixing" the exposure during editing will not result in similar-looking images from shot to shot! Even adjacent images taken a fraction of a second apart may have different white balance, and a slight exposure change also affects contrast, color saturation, and so on. Once you've gone through the process a few times your whole approach will change and you'll try to maximize quality and consistency in-camera, not during editing.

Shoot several hundred images in a row. You can make the timing from frame to frame consistent using an Intervalometer Trigger (external timer), or you can simply hit the shutter release over and over (perhaps use the display of the prior image on the camera rear LCD as your cue to trigger the next shot and keep them at a fairly consistent rate). Remember that your finished product will be 30 frames per second, so you'll need 300 images for each 10 seconds of video. I recommend shooting in RAW format so you can adjust the exposures during editing, especially if you shoot at sunrise or sunset where the light will change over the course of your timelapse.

Read your camera's files into your editing software and crop them to the 16:9 aspect ratio of HD video. Remember that you have far more resolution in your DSLR than you need for HD video, so you can perform a "digital zoom" and focus on only a portion of your original camera image. Software strong in batch editing such as Adobe Lightroom (free trial available) will enable you to apply a consistent crop, exposure adjustments and even spot removal across the entire sequence of images. You'll also want to impose one consistent white balance across the entire sequence. Some video processing software (such as Adobe Premiere I believe) will even let you specify a starting crop and a different finishing crop, then calculate a zoom and pan across your sequence of images.

Save your files in sRGB JPEG format at 1280 x 720 resolution for video to be used on sites like YouTube or Flickr that only allow smaller 720p HD format video, or save them at 1920 x 1080 resolution for 1080p video to be uploaded to sites such as Vimeo. If you'll use the VirtualDub software, it will want you to point to the first image in the sequence then look for a sequential numbered file, so if you used automatic exposure bracketing while shooting you may be editing and saving every third file, but you can rename them sequentially so VirtualDub can order them properly.

Read the sequence into VirtualDub. It's important to notice when trying to import them that in the dialog box where you're looking for the first file to select, the file format has a drop-down menu which enables you to specify that it should look for an image sequence in JPG format.

Add filters as desired, in the order that you want them to apply. For example, Virtualdub can crop and resize larger JPEGs, perform sharpening at the new lower resolution, and you can search for and install a third party "MSU deflicker" filter to improve image consistency from frame to frame across the whole video. Check your frame rate and for maximum quality (but shorter result) change the default 10 frames per second to 30.

Save the video in AVI format. That's a very high quality format, so it may save a file of a gigabyte or more! Enjoy this high quality file on your computer (or read it into video editing software to burn it to Blue-Ray DVD).

To create smaller files for online sharing, read your .AVI file into MPEG Streamclip. Save to MPEG-4, playing with quality vs. file size tradeoffs until the results are what you want.

Upload your results to your favorite video sharing site. That's it! It takes a little more planning to pull off well and a little more time to produce the finished result, but you can produce some amazing videos.

For more information on shooting timelapse sequences, I recommend browsing the discussion forums over on www.Timescapes.org.

Note: although Adobe Lightroom has a retail list price of $300 to buy, there's curently a beta release candidate version 3.3c on Adobe Labs that you can use for free until December 2010. Then you can download the free trial of the production version and use that for another 30 days, so you're set through the end of January at least. Beta users often get a discount on purchase, so if you do eventually choose to buy you may get a lower price.

Wednesday, August 26, 2009

Perseid Meteors Near Tioga Pass: HD Video Timelapse II

To avoid smoke from forest fires in California I traveled to this location at an elevation of 10,000 feet near Tioga Pass in the Sierra Nevada.

To increase the visibility of the meteors, click through to the video's Flickr page and make sure you have the HD display switched on (click on the HD symbol). Then look near the center of the right half of the video to see the most meteors.

This sequence was assembled from 517 21 megapixel photos. The rescaling down to 1280 x 720 for uploading to Flickr helps eliminate much of the noise. The photos on this night were exposed for 10 to 20 seconds at an ISO sensitivity of 3200.

This was taken on the peak night for the meteor showers, but the moon makes all but the brightest meteors difficult to see, especially at these lower resolutions.

Friday, August 21, 2009

Perseid Meteor Shower HD Video

Dozens of Perseid meteors fall in the course of over one hour, compressed into 5 seconds of HD video.

Go to my Flickr account and set the "HD" symbol under the display to see a higher resolution online.

Copyright © Jeff Sullivan 2009. All rights reserved. Do not copy or publish without permission.