Wednesday, June 08, 2011

In Search of a Magazine Cover Photo


Other Worldly, originally uploaded by Jeffrey Sullivan.

A couple of weeks ago Outdoor Photographer Magazine issued a call for potential cover photos. Always up for a challenge, I first created a quick set on Flickr of vertical landscape shots to sort through. There were some good candidates, but I really wanted this, so I decided to keep the cover in mind as I pursued night shots in the Eastern Sierra this week.

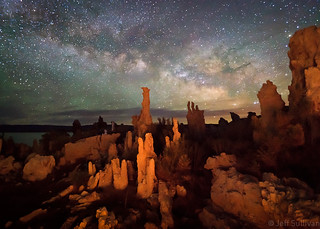
My first stop was Mono Lake. I arrived at 9pm, just as the stars were coming out and the Milky Way was starting to peek over the southern horizon. It was the night of the new moon, so with little ambient light to illuminate the foreground, I brought a selection of flashlights to provide light on the tufa rock formations. I used my typical 30 seconds at f/2.8, ISO 6400 dark night exposure, but I added a small amount of fill light. My LEDs were too blue on the light-colored tufa towers, and direct incandescent flashlight beams were too bright and created too much contrast. I was able to resolve this by moving around during each exposure and reflecting light off of nearby tufa towers, and if none were available, even using my face and hands as portable, positionable reflectors. Cup your hand, and the light is even controllable in general directions! I shot a variety of stills and star trail sequences, finishing with the shot above which allows enough room for a magazine title, articles and so on.

So one decent shot down, I moved to the Buttermilks, where I had a North Star star trails shot in mind. I arrived at 2am, but someone was parked there, camping where I was going to shoot! By the time I moved to another campsite, there was no way I was going to get up in 2 hours for sunrise... I slept in!

I was generally headed toward Kings Canyon and Sequoia National Parks, so in the morning I explored 4WD roads and checked current conditions in the Bishop Creek drainage, then moved on. I arrived at the Alabama Hills, again just in time for night shots.

I scouted out some locations and angles for night workshops, but the clouds were just thick enough to interfere with the production of great Milky Way or star trail shots. By midnight I moved to a decent sunrise location and called it a night.

The next morning I woke at my usual 45 minutes before sunrise (4:45am this week), and the clouds were broken but still blocking the sunrise color. Lacking any particular reason to get up, I stayed in my PJs and waited to see how things developed.


A while later shafts of light started illuminating Mt. Whitney. Game on! With no time to change, I just ran around in my PJs, switching lenses to catch a variety of compositions as the light evolved. I caught at least one dramatic but relatively simple composition of Mt. Whitney that should work well for a cover.
Mt. Whitney from the Alabama Hills
Even with the bust the night before, I felt that I had two solid contenders in two days... a decent start.

I continued south towards a southern hook around the Sierra Nevada and turned toward Kennedy Meadows and a scenic shortcut. The road was closed, and the forecast said it would be raining and snowing over in Kings Canyon for the next few days. Rain and wind was forecast locally as well, but I wasn't going to ditch the trip after two days, so I headed out into the Mojave Desert.

The next morning delivered nice sunrise color, and as I moved around a dry lakebed catching various compositions, there was also a short section of rainbow! The sunlight was really nice as it arrived as well. Third contender, maybe even a fourth.


That night the wind was howling. I literally turned on my lights at one point to see whether someone was rocking the vehicle back and forth as some sort of joke. My SUV was getting sandblasted, and my lenses would too... no shooting tonight.

The next day I took shelter in a coffee shop and went back out in time for another nocturnal adventure. Just as I was approaching a railroad crossing, a train stopped across the road! Google Earth confirmed no reasonable detours. I'd wait, maybe sleep, until the train moved.


Two hours later, it creaked and groaned out of the way, and I was back in business. I shot some moonset shots and started a star trails sequence.

I went to the other side of the car to set my alarm for sunrise, to avoid having light pollution in my shot. I heard something in the gravel on the side with my camera, so I walked around the back to see what was up. I nearly tripped over an animal, which startled and ran, which startled me nearly out of my shoes. I turned on a light, but never saw what it was... judging by the noise, probably a fox or small coyote.

As i started the timelapse I had seen the moon's light shining on some rocks witht he Milky Way overhead, so I headed over to see if they still had any remaining glow on them. They didn't have much if any, but it still made a nice concept, and I could simulate it with light painting. I tried it a few different ways and Bingo! Next candidate on the card.
Far Away (entry in OP's "Cover" assignment)

The Milky Way was really nice, so I decided to leave the camera running all night. It captured 400 frames in the 3+ hours before dawn light washed out the exposure. That yields a whopping 13 seconds of timelapse video: http://www.vimeo.com/24802819

Far Away from Jeff Sullivan on Vimeo.


Checking the weather forecast the next day I finally gave up on the idea of going to Kings Canyon. So I returned to the Alabama Hills, but although I arrived as the moon was tucking down behind the Sierra Nevada after midnight, I was too tired from the drive and the cumulative lack of sleep.

On the following nights the moon would be too bright and stay in the sky too late for Milky Way shots. Time to call the night photography quest a wrap! To round out 5 entries, I ended up choosing two from the trip, a recent Yosemite star trails shot, and added two seascapes from my portfolio for variety. Done. On to the next project!


Star Trails Over Yosemite Falls Weston Cove Sunset Cannon Beach Cloudy Sunset

Wednesday, May 25, 2011

How to Take Milky Way Photos

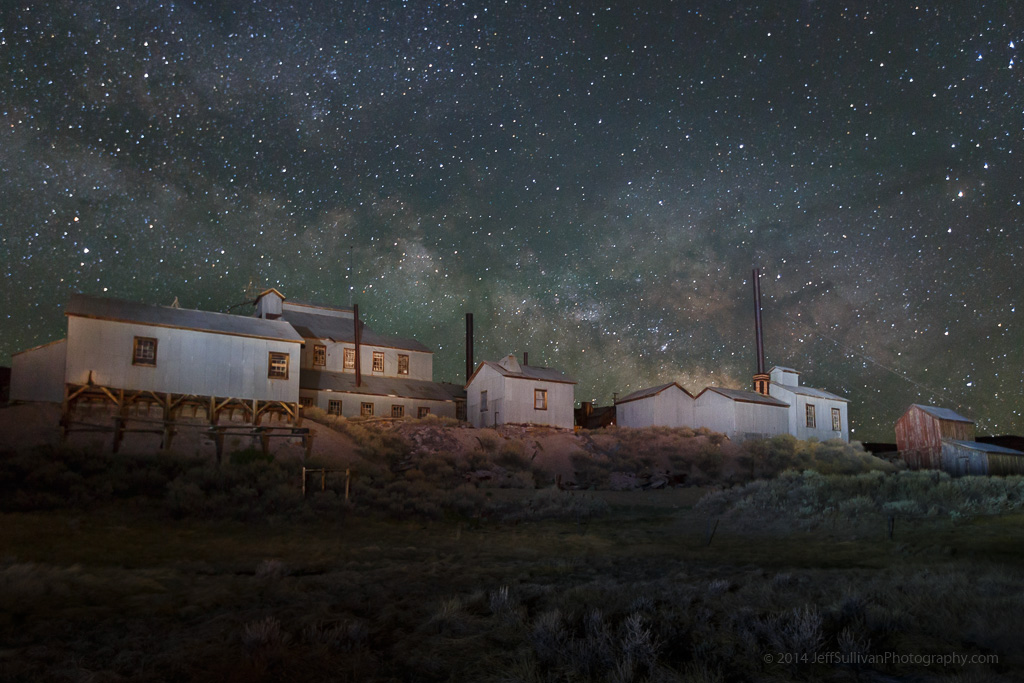
Bodie's Standard Mill
Milky Way over Bodie's Standard Mill
Many digital cameras these days can do surprisingly well at capturing images at night. Their sensors are more sensitive than your eyes, especially at capturing color at night.

Photography has always involved multiple steps, with exposure being only one part of the equation. In the days of film, the darkroom enabled additional influence to be applied during development, and then again during printing. Unless you were using a Polaroid camera, there was no such thing as "straight out of the camera." Maybe you trusted someone in a drug store to do your developing and printing for you, but that wasn't an optimal situation and that certainly doesn't mean that no adjustments were made. For the most part, the entire concept of "straight out of the camera" is a myth that is best set aside as soon and as thoroughly as possible.

Out of this World
Milky Way over Mono Lake tufa formations
Today with digital cameras your darkroom is on a computer, implemented in software. Milky Way shots are a great example of images that you won't get the most out of until you get in the habit of spending 5 minutes in your digital darkroom to complete the photographic process.

If you find a dark place outdoors to shoot and you can make out stars and the lighter, more dense band of the Milky Way, a little postprocessing can get you a lot further. As with my previous blog post you need to shoot on a tripod, using manual aperture and manual focus. Having your long exposure noise reduction turned off is not critical since we're dealing with single exposures for Milky Way shots.

Alien Terrain (vertical) Shoot with your widest focal length lens to minimize star movement in the field of view, have it opened to its widest aperture to minimize exposure time. You may still have little enough light that you shoot at the longest exposure time (generally 30 seconds) or you may need to shoot in "bulb" mode for a longer time in order to get enough light. Always shoot in RAW mode so you have far more adjustment capability in post-processing software.

Shoot near the date of a new moon, so there is as little light pollution as possible. The last thing you need to know, probably the most important thing during planning your shot, is how to predict when the most intricate, dense, bright center of the Milky Way is in the night sky! In Summer the sun is up roughly 2/3 of every day, but the Milky Way crosses the sky in the night. The center of the Milky Way is towards the constellation Sagittarius. You can look up the dates when Sagittarius is high in the sky, and that's when the Milky Way is most intense: http://homepage.ntlworld.com/mjpowell/Astro/Sgr/Find-Sagittarius.htm

In simple terms, it highest around midnight around July 22, two hours later per month earlier (2am in May), two hours earlier per month later (10pm in August). So really your best shooting will be on days near the new moon dates, and preferably within 7 weeks or so of July 22.

So lets assume you go out on the right night, shoot south towards Sagittarius, capture a RAW file with some stars showing, and maybe you can barely make out the bright stripe of the Milky Way and its slightly more dense center.

Well, if you were in a darkroom... how do you lighten the Milky Way while keeping the background sky dark? The simple answer is dodge and burn... selectively darken some areas while lightening others!

Southern California Night Sky In +Adobe Photoshop Lightroom (download a 30 day trial if you don't have it already, AFTER you collect some images to process) use the paintbrush tool (under the Develop module) to select and lighten the area around the Milky Way. Use the paintbrush tool to darken the sky everywhere else (this makes both the Milky Way and the stars pop).

To do even better, you can also increase contrast while performing these functions, further darkening background light levels, including noise. Adjust exposure and brightness so the fainter stars in the Milky Way get brighter while background and noise gets dark. You can increase saturation slightly on the Milky Way, but increasing contrast has that effect already, so you might not need to.

Rocket Trail
NASA satellite launch over the California Coast
Don't worry too much about how much noise your camera produces... after you adjust contrast and brightness, just crank up the noise reduction. After all, there isn't generally much detail to lose by doing that. In Lightroom for dark, noisy photos I try to max out noise reduction at 25 or maybe 30, but lately for night skies I've been going into the 60s.

Lightroom can also selectively adjust saturation and brightness of individual colors. If you shoot too close to sunset and "blue hour", or during a too-bright moon that is too full (and creating blue night sky), it can be handy to darken a blueish background sky to help separate that from the stars (just did that on a star trails shot). On the other hand for dark new moon skies, like you should have if you're planning ahead for Milky Way shooting, there is little or no light scattering turning the sky blue. A lot of the Milky Way stars have a slight blue tint though, so selectively raising brightness of blue can help separate them from dark background and any noise.

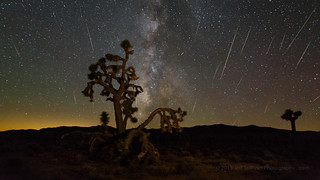
Perseid Meteor Shower 2015
Perseid meteor shower in the Mojave Desert
It's a balancing act between white balance, adjusting individual colors, and tweaking the brightness and especially contrast of the area the Milky Way covers, but you can find a reasonable compromise pretty quickly. Once you do fairly well adjusting one shot, Lightroom enables you to copy your develop settings and apply them to additional photos.

There are other subtle considerations of course, especially for special situations such as meteor showers, but this will get you off to a great start!

---

Milky Way Arch Over Standard Mill
Milky Way arch panorama
If you'd like a little extra help, I lead one night photography workshops in the Wild West "ghost town" of Bodie.  For more practice, you can join me for a longer tour of Yosemite, Death Valley or the Eastern Sierra.

In many cases I offer a visit to Bodie adjacent to one of those longer workshops, so you can shoot in Bodie to start or end your trip.

If you're looking for dark places to try night photography on your own, consider anywhere away from metropolitan areas. I identify over 300 great locations for landscape photography in my new 320-page book, "Photographing California Vol. 2 - South", pictured below.

For night photography in California, focus on locations in the Southern California desert from Anza-Borrego State Park through Joshua Tree National Park and Mojave Preserve to Death Valley National Park, or on the Eastern Sierra region.

I offer author-signed copies on my Web site: www.JeffSullivanPhotography.com

How To Create Star Trails Photos

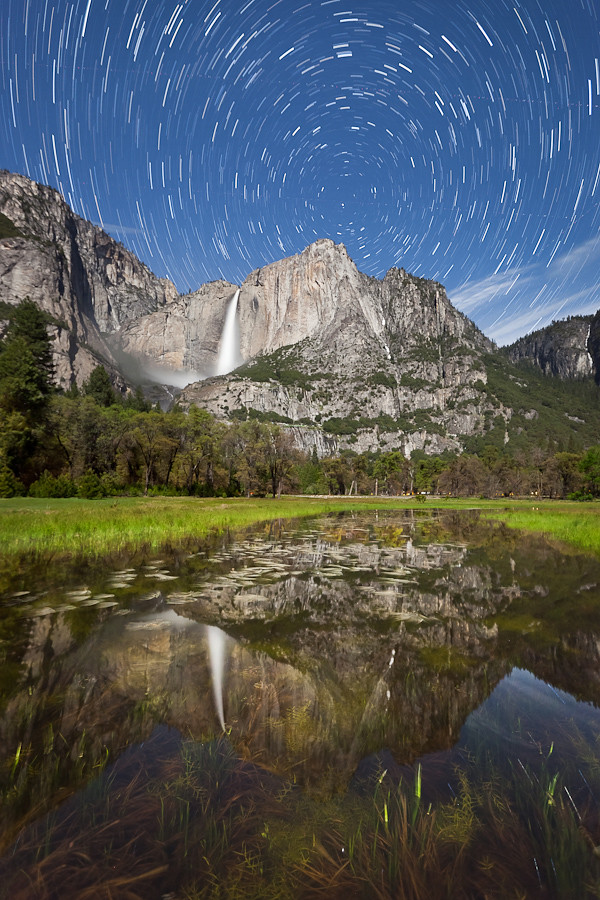
Star Trails Over Yosemite Falls

The Basics

With today's digital cameras it is surprisingly easy to create star trails images. At the highest level, all you do is run a sequence of night star shots through a star trails program and enjoy the result. As is often the case, the challenges come in the details.

Yosemite Falls Moonbow Star TrailsYou'll need to capture images covering 30 to 60 minutes or more. A sturdy tripod is essential. You can trigger exposures manually, but that's tedious and not fun to do for an hour at night. Ideally you'll have a remote trigger that can lock down to fire off sequential shots, or even better, an intervalometer which takes shots at certain intervals which you define.

You'll need to focus your lens on an object at close to infinity, and leave the focus mode set to manual so it won't hunt for focus in the dark. The focus ring of your lens probably continues past that point to compensate for differences as temperatures fluctuate, so focus during daylight on a distant object and note where this is, or if your lens has continuous focus ring with no visible scale, focus your camera during the day, switch it into manual, and carefully tape the focus ring with removable painter's masking tape or gaffer's tape.

You'll want to take sequential shots close together so the star trails to be continuous, so turn off your camera's long exposure noise reduction.

You'll also want a consistent exposure, so use your camera in Manual exposure mode.  Cameras have slightly different sensitivity to light, and the moon brightness (phase) and local light pollution can affect your exposure from night to night, so you'll need to run some tests to determine what settings to use for your individual shots.

Night Rainbows in Lower Yosemite Fall
Full moon exposure: 15 seconds f/4, ISO 3200
Under a bright full moon in clear skies I might start at f/4 at ISO 3200 for 15 seconds. If you'd prefer to drop your ISO to 1600, simple double the shutter speed for the same overall exposure.  On a darker night you can choose a wider aperture, higher ISO, or increase your exposure time using an external intervalometer.  Take lighter and darker shots to ensure that you've identified an exposure which isn't too bright or too dark, then set up your camera to capture a sequence of images at the optimal settings.  The main exposure of 15 seconds enables me to quickly use Automatic Exposure Bracketing to take lighter and darker exposures at 30 and 8 seconds to verify the best exposure setting, then I can pick an equivalent exposure at the camera's longest internally available setting (currently 30 seconds on most cameras).

Once you have the basic exposure figured out, take that exposure over and over until you reach 30 to 45 minutes or more total. Leave as little time as possible between shots.

For this example I used about 80 shots of 30 seconds each, covering 40 minutes. I used the free StarStaX software (www.StarStaX.net) in "lighten" mode, where the lightest pixels are kept as images are merged, creating the trails as the stars move from frame to frame.

Intermediate Considerations

In very long exposures, digital camera sensors can produce random spots of bright single pixels referred to as "hot pixels".  If you're shooting on a relatively warm night, about 60 to 70 degrees or warmer, with many cameras you may start to see more hot pixels the warmer it gets.  StarStax can help you eliminate them.  At the end of your star trails sequence, put your lens cap on and take a few more images of the all-black capped lens at the same settings you've been using.  The only data in the image should be the hot pixels.  StarStaX allows you to identify these images so it can automatically eliminate those hot pixels.

Yosemite is under a major flight path for airplanes
In the old film days, star trails were accomplished by leaving a camera shutter open for one long exposure, even for many hours.  Some purists believe that everything should be captured in one exposure.  Since the photographic industry honors the achievements and traditions established over many decades, photographers who learned on film still dominate the industry in many ways.  Change is slow.  So you might consider a preference for long-held film best practices to be "traditionalist" thinking as well.  There's nothing inherently wrong with this approach, but it's not inherently right or better either, it's just a particular bias that people are welcome to hold if they like.  Unfortunately, few places these days are so unpopulated and uncrowded that you can completely avoid interruptions such as passing headlights or other photographers' flashlights.  So in many cases a single long exposure is likely to be interrupted by a wide range of lights, from airplanes passing overhead to cars or nearby flashlights.  A general approach to be able to edit these out is to capture many exposures, and edit them out frame by frame.

When editing airplane trails out of a starry sky, it is easiest to edit out short ones.  Local light pollution on your foreground, or on a distant road, can be quickly and easily taken out as described below, provided that you have enough exposures to provide images with those areas not polluted with lights.

Advanced Considerations

Darken mode
Unfortunately in Yosemite Valley, the cars driving by create lasting light trails, and headlights spill onto nearby landscape features as well, making them harder to manually edit out than narrow, linear airplane trails. To remove this sort of broad local light pollution, there's also a "darken" mode in StarStaX, which keeps the darkest pixels in the sequence of images that you send it, eliminating the effects and trails of the car headlights.

This also eliminates the star trails, but by using layers in Photoshop and blending that center portion of the darkened sequence into the lightened star trails sequence to get a star trails image without the car lights.

Once you decide to use separate images, you might question whether or not to use 30 second exposures, since that tends to also require high ISO, which many photographers associate with noise, or and very wide apertures, which many photographers associate with lower depth of field and/or softness in focus.  These are valid considerations and if you have an intervalometer that can handle multiple minute exposures, there's no harm in testing different approaches.  But the image stacking process in StarStaX eliminates most noise, so ISO isn't as much of a concern as many photographers tend to assume (at least not for noise).

One sequence of 30-second images
Consider also that you are not nocturnal, and you're far more likely to make mistakes late at night, so do you really want to complicate a process that you'll enter into when somewhat mentally impaired?  You can set up everything when you're alert during the day or evening, then start the image capture later.  I've done that, then started the intervalometers that I had programmed on two cameras for night shooting, only to find the next morning  that I had 1200 exposures of the lens caps that I had neglected to take off.  There's a lot to be said for an easy, repeatable, and infinitely simple process with maximum applicability across as many situations as possible!  I can set 30 seconds in camera, I can have a one second interval between shots.  Done.  It's hard to mess that up.

On some external intervalometers I can lock the shutter release button down to have zero seconds between shots if the camera is set to continuous shooting mode, but there are two new variables introduced, the shooting mode and the intervalometer's features, which will eventually cause problems on a different combinations camera and intervalometer.  Keep it simple, or pursue every last setting for ultimate quality if you wish, but understand that increasing complexity will increase your failure rate.  Time and travel expenses are often the most valuable commodities for a landscape photographer, and long exposures and our desire to sleep make night shooting time even more precious.  How many opportunities do you want to miss, when your itinerary doesn't allow staying an extra night to re-take a shot?

There are other subtle considerations on the capture, post-processing, and output/printing portions of the process, but this will get you off to a great start.

So start simple, and gradually try more ambitious shots or more complicated techniques as you like, but go give star trails a try!

---

Join us to learn night photography in Bodie!
If you want a little extra help, I lead one night photography workshops in the Wild West "ghost town" of Bodie.  For more practice, you can join me for a longer tour of Yosemite, Death Valley or the Eastern Sierra.

In many cases I offer a visit to Bodie adjacent to one of those longer workshops, so you can shoot in Bodie to start or end your trip.

If you're looking for dark places to try night photography on your own, consider anywhere away from metropolitan areas. I identify over 300 great locations for landscape photography in my new 320-page book, "Photographing California Vol. 2 - South", pictured below.

For night photography in California, focus on locations in the Southern California desert from Anza-Borrego State Park through Joshua Tree National Park and Mojave Preserve to Death Valley National Park, or on the Eastern Sierra region.

I offer author-signed copies on my Web site: www.JeffSullivanPhotography.com

Tuesday, April 12, 2011

What's a "Cliche'," and Are Such Images Worth Pursuing??

I've recently received comments on a couple of my vineyard and lone tree photos that they were "cliches."

I don't view that as negative feedback; I've been pursuing illustrative photos for a photo travel guide. Cliches? Bring 'em on! Over-shot viewpoints? Heck yeah, I'll provide detailed directions! As we all dig deeper in the field of landscape photography at our own pace, it's easy to forget that not everyone has the classic shots in their portfolio, and even fewer of their friends, family or fans have have ever seen them. So rather than assume any certain required level of quality or originality in the reader base for my book, I have to provide something for everyone... the now-classic views, the more original compositions available a few steps further from your car, and the totally unique views that I've never seen anywhere else. Something for everyone! So much of my current work is illustrative/documentary. Hey, if I can save you 5 gallons of gas and help you focus on the best locations at any given time, the book will pay for itself very quickly, or hopefully, many times over. Add the variables of seasons, weather, sunrise/sunset, weather, night and astronomical events, and photographer intervention (light painting), and even the most trite viewpoint can offer unique possibilities. I intend to provide the most interesting, diverse, and truly useful guide ever. Will I succeed? Who knows; readers will be the judge. But in my experience I have observed that people rarely exceed their goals, so to provide the best guide possible, I have to shoot for the moon (often literally), and see how close to that ideal the end result cam come. I'll probably never recoup my investment in time and travel, but if I'm going to put my name on it, at least it'll be the best darned photo travel guide that I can possibly produce!

The book aside, a huge percentage of the market for photos is for ones that are "good enough." Not art prints, just stock photography of a representative shot of Half Dome and dozens of other landmarks. I don't currently participate in that market, I value my control over my images way too much (and frankly, microstock has driven the value of such shots way too low), but I want the shots in my portfolio in case I ever decide to pursue that "least common denominator" demand. If someone wants a "one stop shop" for Yosemite images, I want to be able to fulfill that need.

The classic national park viewpoints are often there for a reason. They offer stunning views. If you want that image for your portfolio, don't worry about others' approval, go for it! In the context of your broader portfolio it may fill a valuable role. Only you can decide what you'd like to cover. Shoot for yourself.

Sunday, April 10, 2011

Figueroa Mountain Wildflower Report: April 6, 2011

Figueroa Mountain was less impressive than I expected. Although here are many species blooming, the biggest patches are several of poppies and one small one of lupine in a recently burned area. For now at least, Figueroa Mountain is more of a flower portrait than a flower landscape destination. It's probably worth visiting if you're in the area, but with gas currently over $4.00 it may not be as attractive to visit if a long drive is required.


Wednesday, April 06, 2011

Laurent Martres to Publish California South Guidebook


Where Winds Collide, originally uploaded by Jeffrey Sullivan.

Fans of the popular "Photographing the Southwest" series will be thrilled to hear that Laurent Martres will be publishing a new guidebook to the best landscape photography locations in California. Fans of my photography and workshops will be thrilled to hear that I'm the author!

The announcement was made last night on Laurent's Facebook page.

I'm averaging 5000 miles per month as I chase key astronomical events, seasonal conditions and weather events around the state. I'll be posting updates as I go to my blog, to my Facebook account and to my JeffSullPhoto Twitter feed.


Antelope Valley Wildflower Report 2011


Antelope Valley Poppy, originally uploaded by Jeffrey Sullivan.

Like many place in California the wildflowers aren't as prolific as last year, but it's far form a poor season. You'll have to hunt for the best patches, but here's a sampling of what I found in the Antelope Valley area over the past couple of days.


Carrizo Plain Wildflowers Spring 2011


Tidy Tips at Sunrise, originally uploaded by Jeffrey Sullivan.

Here's a quick photographic tour of conditions at Carrizo Plain a couple of days ago. Opinions on this year's bloom range from normal to "past peak" to "slow and coming," and all three may be true in places. Whatever the high level summary you want to assign, you'll work harder to find less compared to last year, but you can still find some great patches to work with if you put in the time and miles.


Note the new sharing options that will allow you to share this report with your friends on Facebook, etc!