Sunday, August 28, 2011

What Canon Should (Should Have?) Put in the Canon 5D Mark III


As I read the various forecasts about what improvements might appear in the Canon 5D mark III, I manly see lists of slightly improved technical specifications.  Those types of improvements are good, but are you really understanding and solving the challenges that current customers are facing?  Are you also looking at not just evolutionary improvements, but revolutionary ones as well?

Digital cameras seem to be limited to simply copying the functionality of, and the limitations of, analog film cameras. This is unfortunate and unnecessary. True innovation will give some camera company a commanding advantage in the market.  Will it be you?

Your customer base has changed dramatically. Your typical customer even for your highest end cameras has little to no experience. Accept and adjust to that fact. Make your products much more approachable to these new customers, and you will have a major competitive advantage.

With far more customers who are relatively new to photography, it's time for you to address the limited and poor quality information included in your manuals. Don't just describe how to navigate through the menus and how to change settings. Explain what situations those settings are actually useful for. Have a complete and expanded rewrite done in English. Let me download your manual to store, search and use on my iPhone and on iPads. I won't pay more for that (and there's no reason why you can't release the manual in that format... allow others to post it online if you're too cheap to host a couple of servers to provide that service). As I'll explain below in much more detail, there are many features which you may wish to change if you consider more carefully how your cameras are actually being used today.

Your customers are using HDR. A lot. Even people who don't use HDR specifically use other forms of exposure blending: layer masking, image stacking, and so on. These uses are increasing throughout the market, so your performance on multi-shot modes will either become a strategic opportunity to increase market share, or will become a strategic weakness of your cameras. Put a lot of time, thought and effort into improving and extending your multiple exposure modes.
- Create an HDR-friendly Automatic Exposure Bracketing mode which automates the AEB-setting process so the user selects the center exposure value, but the camera selects the brighter and darker exposures to preserve highlight and shadow detail. Let those two additional exposures be asymmetrical, such as one stop brighter and two stops darker. This would be highly valuable to any photographer who might blend exposures via any technique, not just HDR. Don't assume that the feedback you get from a few top professionals (who are comfortable setting bracketing) reflects what your typical customer needs; if you can improve the HDR results of a beginning user, as they share those with their friends you will gain market share.
- Limiting AEB sequences to 3 shots is not acceptable, and not competitive with Nikon. I may only choose 3 shots to process out of the 5 or 7 I shoot, but I want the RAW files available.
- Limiting AEB sequence spacing to +/-2EV shots is not acceptable.

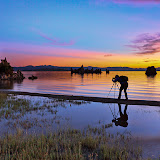
Many customers are producing timelapse sequences, or will be soon. Consider the usability and performance of your camera for producing timelapse videos. 
- For sunset and sunrise, the light changes too much over time to set a single manual exposure. Few of your actual customers have a tripod sturdy enough to allow touching the camera to manually change exposure during the timelapse (and that approach would be too prone to inconsistencies anyway). Yet trying to automate exposure adjustment by using Aperture priority mode, when the camera is about to change to the next 1/3 of a stop brighter or darker, sometimes the camera goes back and forth between brighter and darker exposures, creating unnecessary flicker in the results. One solution would be to create a Timelapse Mode, where the exposure trajectory can be considered (comparison to a moving average), so abrupt back and forth exposure changes will not occur.
- There is no reason to have a computer (digital camera) act in such massive increments as 1/3 stop of light. At least when the camera is operating in Timelapse Mode as described above, let the camera adjust itself in much more gradual exposure increments, such as 1/10th stop.
- There is a need for faster frame per second performance, preferably 6 or more. This helps reduce long term performance bottlenecks over the course of a long timelapse.
- Try using the 5D mark II for timelapse sequences with a long lens. When I'm using mirror lockup with an external timer, give me the option of leaving the mirror up, rather than have it slap back and forth, wearing it out and inserting 2 more seconds between exposures.
- Solve serious performance bottleneck issues with the 5D mark II: The current 5D mark II performance breaks down during sustained shooting. While rated at 3fps for burst shooting, when shooting timelapse sequences of several minutes to an hour or more, it becomes apparent that the actual long term fps performance of the current 5Dmark II is less than one frame every 5-6 seconds. So on the Canon 5D mark II, actual performance experienced by real users can be 18X lower than the specifications commonly advertised! This is not an insignificant shortfall in a $2699 camera (mine was close to $3000 after California sales tax)! If you try to shoot at any faster rate, the camera occasionally gets bogged down processing RAW files and skips a scheduled frame in the timelapse as it tries to catch up. I haven't done the math to calculate whether it's simply a bandwidth issue since I use a 533X card, but neither will most other photographers, If there's a specific card we need for certain types of performance, first know that yourself, then tell your customers what they can expect at various card performance levels. Do I really need the newest, fastest $300 memory card, or will a reasonably fast one closer to $100 be sufficient?

Unconventional features - Sometimes camera manufacturers seem to lack experience and imagination when it comes to how their camera features are being used or could be used by members of their broader customer base.  Get used to the fact that 99% of your customers are not too proud to use automatic modes or simple accessories like built-in flash.  Some people are really into setting up custom modes, but I suspect that most professionals will use whatever works; whatever saves them time and produces results in a predictable and consistent manner.

Flash: The lack of pop-up flash appeals to many elitist snobs, but such a bias is short-sighted, overlooking practical applications. If I'm out shooting a landscape, and a bear, deer, elk, pine martin, bird, moose shows up and all I want is a little catch light in the eyes, do I have the luxury of being able to dig into a bag and pull out a flash (miss the shot timing and/or scare them away witht he movement)? Or can I trust that an external strobe is charged in the days or weeks since I've used it last? Do I want to carry the rock-like Canon 580EX when I go backpacking? No, no, NO! Or could a pop-up be better than nothing in those fractions of a second before a shot might be lost? There are times when the clunkiness of an off-camera or shoe-mounted flash is acceptable, other times when the next best thing would be far better than nothing. This is another great example of where you'd probably get a very poor indication from traditional top photographers on what the majority of your actual customer base might actually find useful. I'd even accept a flush-mount built-in flash instead of nothing; just make sure that it has a daylight color temperature.

Modes: give me a Sports mode that shoots in RAW for random wildlife appearances (also Portrait and Night Portrait, also respecting my RAW setting). I don't want to have to reinvent them using custom modes C1-C3 (I also don't want to give up RAW results, a full frame sensor, ISO 6400, etc. either).

Night photography is one of the big incentives your customers have to upgrade to the 5D mark II or its replacement. Consider a wide variety of night applications and improve or add relevant features:
- Let me set exposures longer than 30 seconds, in-camera.  30 seconds is not long enough before requiring the camera to be used in Bulb mode. Why were cameras limited to 30 seconds in the past? Probably because film suffered reciprocity failure. That's gone, so drop the limitation. For evening seascapes I'd like to be able to produce three bracketed exposures, with the shortest at 30 seconds and at least one exposure at 2 minutes, so if that's the middle exposure the longest one would be 8 minutes. I want to be able to use that 10 minutes to do something else (shoot my backup camera); don't make me stand there and time (or delay the interval between to program my intervalometer to time) 3 different Bulb exposures!
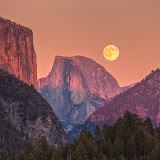
- Add a "Full Moon" AEB mode. While I'm optimizing my AEB sequence to cover the foreground, midground and background, let me turn on a mode to automatically add one reasonably close exposure for the full moon. I currently have to fake this by working in one mode such as Aperture for the landscape then rotating the mode into manual mode for the moon, but that introduces a time delay during which the moon moves, and for night exposures it is unacceptable to have to touch the camera (jostle the camera and tripod) between exposures which are intended to be merged later.
- Build the intervalometer into the camera. It's in Nikon's D7000, it was in the Canon Powershot G5, so where's yours now Canon? External cables cost more, take space, add weight, and they are prone to failure.
- ISO 12,800 and/or 25,600, and better low noise performance at ISO6400
- Make sure you keep the dual Digic processors, and that noise reduction even on long, high ISO night exposures can be completed within a fraction of one second after the shutter closes.

Video features and performance: Canon seems to currently have an edge over Nikon in video features across much of their product line. Rumors claim that video development is progressing separately from still image features, and this may lead to two separate camera models. I feel this would be a strategic mistake to lose the competitive advantage of having a camera that does both. The video features on the 5D mark II were very well received by the market, and If you paid a little more attention to features and usability this lead could be maintained:
- stereo microphone, with better wind screening
- Make video mode more usable: sound level meter, etc.
- Higher ISO video shooting

Improve handling of dust, and do so in our typical workflow!  Current approaches for handling dust (shaking sensors and so on) are very inadequate. Postprocessing is a critical point in the process to add value:
- That's great that Canon has the concept of capturing Dust Delete Data and at least in theory can use that data to reduce the appearance of dust spots in Canon's Digital Photo Processing (DPP) software. But on days when I have 600 separate images to process from a day, or if I have a 1200 image timelapse sequence, where exactly do you expect DPP to fit into a typical workflow? How would I transfer the data to efficient workflow tools like Lightroom? I produce 16-32GB of images per day in RAW format, I can't add intermediate TIFF files of 120MB each (a total of over 400GB of data per day). DPP should be implemented as a plug-in for Lightroom, possibly for Photoshop as well.
- there is a need for a timelapse editing tool, which preferably could be integrated into Adobe Lightroom as a plug-in, which would adjust long term trends in exposure across dozens of photos.

Other improvement requests in the next generation:
- Higher resolution (not the most critical requirement though... don't sacrifice improvements in high ISO / noise performance!

Revolutionary Improvements
My iPhone is a computer with 32GB storage.
- Smart Phone Control - Offer an interface to enable iPhones, iPads and Android devices to control my camera (I suspect that third party solutions exist, but it is strategic for you to fully understand the uses, needs, and future potential of this type of application).  Bluetooth wireless?
- Apps - Look at the rich market for "iPhoneography" post-processing applications.  Enable users to add third-party apps programs which can facilitate and perform non-destructive postprocessing, and to transfer RAW files over to Lightroom with those changes non-destructively applied in my Lightroom catalog.  This enables the entire iPhone developer community to add value to your camera.  There is little limit to what the imagination and resources of such a developer community might produce.  Again, it may be strategic for you to be very closely involved in facilitating such applications.
- As prices come down, an iPhone-like computer and display could be built into the camera.

It's Time for Digital Cameras To Depart from the Film Model


Digital cameras are computers, ones which lack even a basic predictable response to exposure. There, I said it. It's a weight off my mind. The opportunities offered by our image-capturing computers offers far more opportunities than problems. I'll explain in a moment, but first, let me give you some background.

I worked as an application engineer at the world's leading color printer company for years. I doubt a week went by when we weren't talking about imperfect color response in CCD imaging chips (in scanners at that time), differences across color space representations, additive vs. subtractive color, and the imperfect frequency transmission response of coatings, filters and glass. You'll probably never hear this from the industry leaders; no manufacturer want to reveal that the fundamental reality of their product is that it is imperfect. This isn't to way that cameras and today's post-processing isn't doing a relatively good job, I'm just pointing out that the reality of the situation is that entire process has small issues and attempted corrections, and as light passes through a filter, lens, is recorded on a CCD, stored in a RAW format, then interpreted by software for display on an LCD, converted to TIFF or RGB JPEG, and later printed on a printer, what is not well known or generally accepted in the general market is that there is no possibility of perfection, only a result which is good enough, as far as we can tell. In practice, things get worse from there, if you're overly obsessed with trying to capture exactly "what's there" when you trigger the shutter.

Let's take a simple case. Adobe Lightroom provides a great opportunity to compare adjacent bracketed exposures, and one of the main reasons I use bracketing is that when you change exposure even one stop on a digital camera, forget the theory you learned about stops of light. On a real digital camera, after correcting all RAW files to theoretically have the same exposure, a -1EV exposure will typically need one full "stop" of contrast increase in Lightroom to approach the color and contrast of the -2EV exposure. The 0EV exposure needs two "stops" of contrast increase. But the three exposures may need additional adjustment (increase black levels on the lighter exposures) to approach each other, and they may never be adjustable to become fully identical. So the bottom line is, even on my Canon 5D mark II which cost a few pennies shy of $3000 (after California sales tax), the concept of "one proper exposure" pretty much goes out the window. No doubt others have noticed this, but the greater photography community hasn't fully identified, accepted or acknowledged this yet.

The myth of "the perfect exposure" persists, and many photographers are reluctant to use bracketing (or at least to admit that they do), as if being a technician to obtain a decent exposure in one try were some sort of accomplishment or prize. Really? Sure, it saved film and cost in the past, but in today's digital world with immediate result previews, is being minimally competent really such a challenge or accomplishment, the pinnacle of achievement we should hope for? Are we not pursuing art, some final result? Is using a different or innovative technique frowned upon in other artistic mediums such as oil painting, or are the people who successfully break from tired techniques celebrated when appropriate? In the case of the single exposure photo, given the clear issues with digital sensor response, it's simply a holdover from a different era, an overly used technique that has now become a less than optimal approach. The prejudice and misconceptions on this minor procedural point are so bad in the industry, I hear that some major photo contests disqualify entries which show in EXIF that auto exposure bracketing was turned on. I've never seen that disclosed in any contest rules, so apparently they don't even disclose that judging prejudice (based on technical and experiencial ignorance in digital) before accepting your entry fee! Is it really so taboo to overcome the fact and reality of non-linear response to light in digital sensors? Ignorance is bliss among Luddites; protect the illusions of the old analog paradigm of photography at all costs.

The solution? In some respects, the performance characteristics of digital cameras don't really matter much. Fortunately humans lack the basic capacity of color memory, so you can produce whatever you think is realistic, and neither you nor anyone else will ever know any better.

There are other reasons why it's unfortunate that digital photography is simply trying to mimic the operation of an analog camera. Consider that practically all of the acknowledged leaders in the photography market, in every nook and cranny of the business, from product designers to CEOs to the most prominent and successful photographers, started their careers in film. Change means risk; assuming (even pretending) that digital photography is simply a new way of performing analog photography is safe for everyone involved. They maintain their job security. Everyone's happy. Consumers don't know any better... they're getting a better camera... without the per-frame costs of film (although we're consuming storage and computers at an alarming rate instead).

But today's digital cameras are like the first IBM Selectric typewriters... put a computer inside, to simply emulate a previous manual device. Hooray, we can go back and correct letters within the past 40 typed! Isn't life good? It took another decade or more before computers developed enough to put document design into end users' hands, but now individuals can design entire books at home.

Today's cameras are already computers, so we don't need to wait for technology, the main barrier is inertia, the laziness of established companies lacking imagination and true innovation. Any manufacturer can work towards empowering today's very different buyers and users of cameras. But this is best started with the assumption that they can, perhaps must, break the old analog camera design rules, and introduce revolutionary new and much more effective image-capturing tools and techniques. What the Mac was to text-based personal computers, what the iPhone is compared to traditional cellphones, a re-imagined digital camera could be when compared to film cameras. This leads me into my next topic, where I'll provide some examples which strike me as pretty obvious to digital camera users who really put their digital cameras through their paces today: what Canon should have put into the Canon 5D mark III.

Friday, August 26, 2011

How is Eminem Relevant to Landscape Photography?


Someone asked me recently why I like Eminem (+Eminem Marshall Mathers, the best-selling artist over the past decade). She listens to country music... where to start? His first few albums were entertaining, with some funny lyrics, and even funnier music videos, often parodying celebrities and other public figures. But his later work became deeply personal, reflecting challenges he faced in his life. His lyrics are dense, intelligent, and they often resonate deeply as I pursue photography.

The best opportunities in landscape photography often last for a matter of seconds. From a given sunset I may have dozens of good shots, but often only one image rises head and shoulders above the rest, even compared to adjacent frames captured seconds earlier or later.

Look, if you had one shot, or one opportunity
One moment
Would you capture it or just let it slip?


You have to be in the right place, at the right time, with the right conditions, and when you are, you'd better have the required skills (knowledge of your camera's features), and at least for for 15 or 20 critical minutes, stay laser-focused on the task at hand.

You better lose yourself in the music, the moment
You own it, you better never let it go
You only get one shot, do not miss your chance to blow
This opportunity comes once in a lifetime


Are you a spectator of sunsets who happens to shoot photos, or are you completely focused on getting the right composition and exactly the right exposures, including a dark enough one so the outline of the sun won't be blown out when it's in the composition? Is your lens clean to minimize spots of lens flare? Take yourself seriously. Be prepared, then when those precious critical moments arrive, focus on the task at hand with every shred of concentration you can muster.

To be perfectly honest, travel can be tiring; I'm not always completely motivated or focused. Fully appreciating that reality forces me to confront the fact that moments, days, weeks and months tend to slip inexhorably by in our lives without being fully experienced, let alone best utilized in support of our life or creative goals. Instead of succumbing to the mental medication of TV (or the Internet), I resolve to take full advantage of rare opportunities when they come up (weather, sunrises/sunsets, moon rises, meteor showers, the book project i'm working on). Each is a moment in time and space, never to be repeated. I either make productive use of them, or not. My success, the path I'm currently choosing for my life, depends on it.

Success is my only m@#@&#$!& option, failure's not
I cannot grow old in Salem's Lot
So here I go it's my shot.
Feet fail me not
this may be the only opportunity that I got


My success depends in part on how often and how successfully I take advantage of the cumulative opportunities that are available in a given month and year.

You can do anything you set your mind to

The key portion of that parting statement is the "you can do": what you set your mind to can't stay in your mind. Your desires must translates into deliberate and competent action. I need to keep my sensor and lenses cleaner. What can you "do", in the planning or execution of your photography, to more efffectively move yourself forward towards your goals?

Wednesday, August 24, 2011

My Blog is now Available on Your IPhone/IPad/Droid!

Stay current on the latest updates to my blog using the PhotoVerse app. It costs only $0.99, and it includes feeds from many photographers as well as sites broadcasting photography industry news.
Photoverse is a utility application developed by Photographers for Photographers. Photoverse collects information from multiple news sources and blogs related to photography, pools them and presents them to you in an easy to read scrollable list.

It is a great way to keep tab of the latest happenings in Photography.


HDRs: Good, Bad, or Something Else?


Select the photo above to visit the Picasa album: "HDRs in 2011 So Far"

HDR, "High Dynamic Range" photography has been around since at least 2003 when HDRsoft released Photomatix 1.0. It has become popular in recent years as some photographers try to overcome sensitivity limitations in digital sensors, and as other photographers use it to make their results look more dramatic. But will HDR succumb to a backlash, as over-saturated images did when Photoshop became widely used, or will it find a permanent place in photography's bag of accepted processes? That may depend on what your aspirations are. If you want to call your work "art" you can do what you want and see whether someone will pay you for it. If you'd love to work for National Geographic, you'd be wise to heed their requirements for their photo contests:
"Minor burning, dodging, and color correction are acceptable. High dynamic range images (HDR) and stitched panoramas are NOT acceptable." They go into more detail in their statement on digital manipulation.

As Ansel Adams developed his approach to photography, it had become very trendy for other photographers to hand-color their black and white prints. Color was new to photography, and the dramatic enhancement that color could add to an otherwise boring result gave many photographers a lot of attention. But over the long run, if a gimmick is what your'e relying on, and everyone has access to that same trick, your work will get lost in a sea of similarly altered results. How many of those photographers who clearly enhanced their photos do we know the names of today? Ansel Adams went in the other direction, working for hours in the darkroom to ensure that his artistic interpretations of a scene were presented in a realistic-looking way.

I've posted a lot of HDR photos to the new Google+ social networking platform recently to research how my use of HDR has changed over the past few years. I used it over 50% of the time in 2008 yet my Spring 2011 album shows the other side of the story, how my use of HDR has dropped below 5% as I follow Ansel's lead to pursue more realistic results. Time will tell whether history repeats itself and today's digital manipulations go the way of hand tinting, but I figure it's always useful to maintain skill in both the realistic and unrealistic camps, so at least whatever look you choose for a given image is a deliberate one, not simply the result that certain software imposes. I'd like to have enough control that I can compose images as an artist and share the light that I experienced, not spend my time as a technician, a captive to a limited repertoire of effects which fail to accurately convey the nature of the place and destroy the quality of that light!

Some people take a strong stance for or against HDR. My take on it is somewhere in between. Like many people I do get weary of seeing some of the most dramatic departures from natural-looking results now that the novelty of that look has worn off, but at the same time I find HDR useful in producing a small percentage of my images.

Some people have said that Ansel Adams surely would have embraced Photoshop and/or HDR, since his photos definitely did not seek to capture a simple reflection of how a scene looked when he saw it:
"You don't take a photograph, you make it."

On the other hand, as far as most viewers could tell, his results were plausibly realistic. Judging by his words, I think he would have certainly explored HDR, encouraged others to do the same:
"I hope that my work will encourage self expression in others and stimulate the search for beauty and creative excitement in the great world around us"

Ansel probably would have chosen to use HDR in a reality-supporting way, which may be new concept for some of the biggest proponents of HDR who advocate its more-than-reality potential.

Which direction should you choose? Sorry, I'm not a fan of "shoulds". I'd advise you to try a lot of different things, then choose your own path. But bear in mind if you enter photo contests that many of the most prominent photographers in the industry started in film, and some of them haven't even adopted digital yet. The over-saturation of Velvia film is fine with them, but they'll be turned off if they think you've applied even the exact same amount of saturation to a digital image. Typical results from HDR software could cause an even stronger negative reaction. Double standard? Sure. Just the way the world works sometimes? Absolutely. The bottom line is, do what you can, and when you develop a following of fans do what you want, keeping in mind the intended audience for your work.

If you've never tried HDR, you can download a copy of the latest Photomatix software to try at www.HDRsoft.com. Play around with it, and have fun! Search my blog for "technique tips" to see some my prior advice on how to prepare images for HDR processing.

If you decide to buy Photomatix HDR software, I do recommend the version with an interface to Lightroom and Photoshop, to give you the most control.  You can get a 15% discount by using the coupon code JeffSullivan when you by it from its publisher HDRsoft: http://www.hdrsoft.com/order.php

Here are a couple of non-HDR images to show what you can do with standard image editing tools such as Adobe Lightroom:

Saturday, August 13, 2011

How to Create a Timelapse Video of a Meteor Shower

Perseid Meteor Shower, August 2013

The Perseid Meteor Shower runs from July 17 - August 24, with peak night occurring around August 12-14. When shooting night landscapes and trying to catch meteor showers, I like taking long exposures one after another, so you catch anything which flies through your camera's field of view. If you shoot continuously for a while and catch a couple of hundred exposures or more, you can even assemble those shots into a time-lapse video.

Lets do a little math to figure out how your still shots will transfer to video. When deciding how long to shoot, bear in mind that this is a time-lapse video, so in playback as video everything is dramatically sped up. Each frame is a 5 to 30 second shot, but video is 24 or 30 frames per second. To make the meteors last more than 1/30th of a second, you may want them to be present for two frames of video, and assemble your video at a relatively slow frame rate of only 12 shots per second, so in video formats that play at 24 to 30 frames per second, the meteors show up for at least two frames. Fortunately our eyes and minds are quick enough for us to perceive the meteors with some persistence even though they show up for only 1/12th of a second.


On a dark night your exposures may be 30 seconds or more, so at 24 frames per second each hour of shooting will give you less than 5 seconds of video. With the nearly full moon last night, there was enough light that I was able to reduce my exposure time to 5 seconds. I set an external timer (intervalometer) to take the next shot one second later, so I took one very 6 seconds, or 10 shots per minute. So if I'm using a slow frame rate of 12 frames per second to make the meteors more persistent in the video, I'll end up with almost one second of video per minute of shooting. Adjust your exposures per minute and video frames per second math to figure out how fast you want your shooting sequence to play back.

If you'd like to explore time-lapse photography yourself, download the free VirtualDub software which can convert a sequence of JPEG files into video, and check out the forum on www.Timescapes.org for discussions on techniques. You'll need a tripod of course, and your sequence of still images will turn out best if you use a remote switch that has an intervalometer (timer) function.

Update March 2016: One more thing, meteors are more common after midnight, so I usually arrive on site around 11 pm to give myself an hour to set up before I have to start shooting.  Basically where you are on earth rotates around to the front of the Earth's path through space at midnight, so the sky above you collides with more comet dust from then until astronomical twilight starts before dawn, as this article explains.

5 Chrome Extensions That Improve Google+

5 Chrome Extensions That Improve Google+

Google+ has only been around about 6 weeks. It's getting rave reviews, for a number of reasons:

1) The "circles" concepts enables posts to be highly targeted, so you send information to exactly who will want it, and you receive less uninteresting material as well.

2) Less threat of your data/photos being misused? Google has had time to learn from Facebook's careless treatment of personal data and the negative reaction to Facebook's apparent intent to sell your photos for random, who-knows-what use.

3) It's much easier to connect. I've been on Google+ 2 or 3 weeks and I already have far, far more interaction over there, on a platform far smaller than Facebook.

4) Twitter with photos and no 140 character limit, Facebook without the 400 character limit. Just say what you need to say.

They're trying to grow gradually so as not to bog down the service so it can be hard to register, but each user has an allocation of 150 invitations, so let me know if you need one (I'll need your email address).

If you're already on Google +, look ma up. Here's my standard Google+ URL:
https://plus.google.com/107459220492917008623/posts

Once you're on Google+ you can register for a shorter, easier to type and remember redirect like this one, using Google Plus Nick:
http://gplus.to/JeffSullivan

Wednesday, August 10, 2011

South Lake Tahoe Fireworks Ranked #6 in America

Fireworks in South Lake Tahoe

I've seen fireworks displays in at least a few dozen locations in America, over cities, theme parks, mountains, the ocean, and lakes. This Summer I saw the best I've seen yet, in South lake Tahoe. Ranked #6 on the top 15 by AOL, (July 4th Fireworks: 15 of the Biggest Shows in America Ranked), it offers some of the most interesting and innovative burst patterns I've seen. The pace is great, choreographed to music playing on a local radio station.  If you live within driving distance, it's definitely a show to put on your bucket list.

Impeccably choreographed fireworks display.

Friday, August 05, 2011

Perseid Meteor Showers in August


It's that time of the year again! The annual Perseid Meteor Shower is underway. This year the peak nights of the shower will coincide with a full moon. This will obscure all but the brightest meteors, but there are still some decent opportunities for photography. Try early morning hours over the next few nights, after the moon has set. Even when the moon is in the sky you can shoot North-facing shots to face away from the moon and capture the brightest meteors, as well as star trails around the North Star, Polaris.

The meteors will appear to come from the radiant constellation Perseus, not far from Cassiopeia (a giant W you can spot more or less opposite the North Star from the Big Dipper). Get out someplace dark and clear, and enjoy the show! Best viewing hours are 11pm - 4:30am as the Eastern half of your sky rotates around to the leading side of the earth as we hurtle through space at 69,360 MPH around the sun (574,585 MPH relative to the Milky Way, another 1,339,200 MPH relative to other galaxies).

The moon sets at 11:30pm tonight, then roughly another hour later each night, so get outside in the early morning hours and watch the show, and capture star shots while the stars remain bright in the moonless sky.

Read down a few posts on my blog to see tips on capturing Milky Way or star trails photos. To maximize your odds of capturing some bright meteors, simply trigger your exposures as fast as your camera will go. I use an external "intervalometer" timer/trigger to start the next exposure one second after the previous one. By capturing dozens or hundreds of exposures in a row, you can capture many meteors over the course of many minutes or hours.

The photo at the top of this blog entry is a link to a whole album of Perseid Meteor Shower photos from past years. Go check them out for some inspiration or ideas!

Monday, August 01, 2011

Create a Timelapse Video on Your Digital Camera

Lunar Moonbows in Upper Yosemite Falls from Jeff Sullivan on Vimeo.

Timelapse videos are easy to create on your DSLR. There are many software packages which will facilitate the process, some better than others, but I'll describe the simple and relatively low cost workflow that I currently use. You'll need software on your PC which can convert a sequence of JPEG files to timelapse video. I use VirtualDub (free download) to create an AVI format video, then I use MPEG Streamclip (free download) to convert the huge .AVI file to a much smaller (albeit lower quality) MPEG-4 for online use. Here's the process from shooting to finished video:

Clean your camera sensor. It is hard enough to remove dust from one image... picture having to do that 300 times. Even copying dust removal from one image to the others, the data changes over time (from shot to shot), so it really won't work well across the whole sequence. It's far, far better to remove the dust up front. Clean your camera sensor!.

Put your camera on a sturdy tripod. Install a fully charged battery and a blank, freshly-formatted memory card which can handle several hundred images.

Compose your image expecting to lose some of the vertical information if you'll convert the sequence to HD video with a narrow HD shape (16:9 aspect ratio).

Manually focus your camera and switch off automatic focus. If you forget to do this, your camera will insert delays in the sequence as it hunts for focus, making the playback jerky at best. Worst case, your camera may lose focus and you'll end up with a whole lot of blurry images.

Make some test shots to determine best exposure. If practical, set exposure manually so it won't change from shot to shot and cause flashing (flicker) as different exposures come up during playback. If the light will change a lot during shooting (sunrise and sunset), you can use automatic exposure, but then the exposure during the video is artificially stagnant, and you'll need to to "deflicker" the timelapse to reduce flashing from frame to frame when producing the video. You will learn some very interesting and important things about your DLSR in this process! When your DSLR changes the exposure up or down 1/3 stop from shot to shot, simply "fixing" the exposure during editing will not result in similar-looking images from shot to shot! Even adjacent images taken a fraction of a second apart may have different white balance, and a slight exposure change also affects contrast, color saturation, and so on. Once you've gone through the process a few times your whole approach will change and you'll try to maximize quality and consistency in-camera, not during editing.

Shoot several hundred images in a row. You can make the timing from frame to frame consistent using an Intervalometer Trigger (external timer), or you can simply hit the shutter release over and over (perhaps use the display of the prior image on the camera rear LCD as your cue to trigger the next shot and keep them at a fairly consistent rate). Remember that your finished product will be 30 frames per second, so you'll need 300 images for each 10 seconds of video. I recommend shooting in RAW format so you can adjust the exposures during editing, especially if you shoot at sunrise or sunset where the light will change over the course of your timelapse.

Read your camera's files into your editing software and crop them to the 16:9 aspect ratio of HD video. Remember that you have far more resolution in your DSLR than you need for HD video, so you can perform a "digital zoom" and focus on only a portion of your original camera image. Software strong in batch editing such as Adobe Lightroom (free trial available) will enable you to apply a consistent crop, exposure adjustments and even spot removal across the entire sequence of images. You'll also want to impose one consistent white balance across the entire sequence. Some video processing software (such as Adobe Premiere I believe) will even let you specify a starting crop and a different finishing crop, then calculate a zoom and pan across your sequence of images.

Save your files in sRGB JPEG format at 1280 x 720 resolution for video to be used on sites like YouTube or Flickr that only allow smaller 720p HD format video, or save them at 1920 x 1080 resolution for 1080p video to be uploaded to sites such as Vimeo. If you'll use the VirtualDub software, it will want you to point to the first image in the sequence then look for a sequential numbered file, so if you used automatic exposure bracketing while shooting you may be editing and saving every third file, but you can rename them sequentially so VirtualDub can order them properly.

Read the sequence into VirtualDub. It's important to notice when trying to import them that in the dialog box where you're looking for the first file to select, the file format has a drop-down menu which enables you to specify that it should look for an image sequence in JPG format.

Add filters as desired, in the order that you want them to apply. For example, Virtualdub can crop and resize larger JPEGs, perform sharpening at the new lower resolution, and you can search for and install a third party "MSU deflicker" filter to improve image consistency from frame to frame across the whole video. Check your frame rate and for maximum quality (but shorter result) change the default 10 frames per second to 30.

Save the video in AVI format. That's a very high quality format, so it may save a file of a gigabyte or more! Enjoy this high quality file on your computer (or read it into video editing software to burn it to Blue-Ray DVD).

To create smaller files for online sharing, read your .AVI file into MPEG Streamclip. Save to MPEG-4, playing with quality vs. file size tradeoffs until the results are what you want.

Upload your results to your favorite video sharing site. That's it! It takes a little more planning to pull off well and a little more time to produce the finished result, but you can produce some amazing videos.

For more information on shooting timelapse sequences, I recommend browsing the discussion forums over on www.Timescapes.org.

Note: although Adobe Lightroom has a retail list price of $300 to buy, Adobe offers a free trial.


This is an updated re-post of my November 2010 blog post since the link to the original timelapse video on Flickr appears to have broken. Instead I've posted links to videos on Vimeo:

Pfeiffer Beach Winter Sunset from Jeff Sullivan on Vimeo.