Showing posts with label tips. Show all posts

Tuesday, June 09, 2015

RAW vs JPG for Mobile Phone Photography - LG G4


LG G4 RAW capture, manual exposure, unadjusted, cropped to 2047 x 2047, saved at 90% JPG quality, Adobe Lightroom 5.7.
I continue to experiment with manual exposure and the ability to capture images in RAW format on the LG G4 mobile phone, since it's one of the first (the first?) phone cameras to offer that capability.  Above is the RAW file.

Next let's look at a copy edited in +Adobe Photoshop Lightroom mobile on +Android:

Image adjusted in Adobe Lightroom mobile app, color, contrast, etc, vignette applied.
The original files are 5312 x 2988 resolution, 16 megapixels. This was cropped square, top to bottom in the original frame, so it was 2988 x 2988, but it's displayed at 2048 x 2048 here.  Looking at the Lightroom folder on the LG G4, that downsize in resolution seemed to happen automatically in the Lightroom software.

Now I'll upload the original RAW file here, saved to JPG (80% quality) so it will display:


The unadjusted RAW file was 20 MB, then saved to JPG 80% resolution it's now 6.56MB
But guess what I was actually taking a picture of... I was trying out an 8X digital zoom on the toad's eye from about 4" away, so I could see how a macro-like the result would turn out.  I was shooting in RAW + JPG mode, and this zoomed view saved at the same and with the same file name as the wider RAW file above:

8x zoom from 4" away! (JPG file created by the LG G4 alongside the RAW image with wider field of view)
The LG G4 has an 8-way optical image stabilizer, improved from the 4-way OIS on the LG G3.  Multiply hand shake with 8X zoom, arms outstretched to ground level, a few inches from the subject, and this is an impressive result.  Next I'll have to try it with the phone stationary to test the phone's close focusing and image quality without unsteady hands being a factor.

What's interesting about this 8X zoom shot is that the file still saves at 5312 x 2988.  If you click on the zoomed JPG, it isn't noticeably jagged with blocks of pixels duplicated many times to the higher resolution.

Zooming in on the JPG file saved by the LG G4
Some of that could be dither patterns to map RAW data to the smaller color palette of 8-bit JPG, but there could be some interpolation involved to predict and fill in data as well, so let's look at the JPG save of the RAW file to see what the actual pixel size is.

Zooming in on my 80% quality JPG save of original RAW file to see actual pixel size.
Sure enough, we were a bit over-zoomed on the LG G4's own JPG save of the 8X digitally zoomed image, but it's nice to see dither patterns (in that prior, tighter image) used to approximate more colors.  that's what printers do as well, when you send them a file format with more colors than they have dots of color to represent.

But we're still not looking at the original RAW data... how much did my decision to save at only 80% JPG quality affect the output?  Let's look at the file still in Lightroom, since it should be able to represent the original DNG RAW colors using the full color pallette of the display card.  Here's a screen shot of that:

Now the RAW file adjusted, this is as far as Lightroom would let me zoom on my 1920 x 1080 display.
But screen shots are saved in JPG, so by the time someone shows that to you, you still don't get the full data present in the RAW file.  Let's pixel peep on that anyway, fully understanding and acknowledging the limitations:

This screen shot of the adjusted RAW file, as it appears in Lightroom above, was effectively converted to JPG in Windows
The screen shot of the RAW file in Lightroom was effectively converted to JPG in Windows, but it already looks better than the RAW saved to JPG at 80% quality, so that quality setting was a factor in the prior crop.  Let's now crop the eye first, then save the RAW to JPG at 100% JPG quality.

RAW file cropped to 601 x 601 pixels, saved at 100% quality JPG, inserted into blog at 600 pixels
I've cropped that last image to be inserted into the blog at a 1:1 size, not over-zoomed, and it's 100% JPG quality, so reduced in quality from the original RAW but about the best we can do in JPG format.

Let's repost that unadjusted 8X zoom RAW file that the LG G4 saved again here, for a fairly direct comparison:

That 8X zoom file the LG G4 saved alongside the wider view RAW file.
The adjusted/edited RAW file looks better than the camera-saved JPG file, but that's the whole point of saving RAW in the first place, to have the option to work on the original sensor data and produce a better edit, if and when it makes sense to invest that additional time.

If you're on the run and need to post a quick preview, many reviews confirm that the camera on the LG G4 will produce JPG files comparable with other top phone cameras.  But such reviews of straight-out-of-camera results clearly fail to fully show the full strength of the LG G4 camera, and its ability to produce stunning results, edited either in a mobile app (second from the top above) or in traditional desktop editing software (below).

Adjusted in desktop version of Lightroom (5.7), brightness, contrast, etc, less vignette applied than in mobile version
Conclusion: RAW is clearly the way to go when quality matters, which should give the LG G4 a leg up on competitors for a while, until more of them join the RAW party.

I had been provided with the LG G4 to preview it prior to its public release, but now I have to make a personal decision on which phone to use going forward.  I find that it's what I reach for 90% of the time for general image quality anyway (including low light performance, excellent image stabilization and good quality quick JPG HDRs).

Upon further inspection, the ability to select manual exposure and produce RAW output isn't just an incremental feature, it opens up a while new category of mobile phone camera.  Consider what third party apps can do with that... using exposures up to 30 seconds, producing higher quality results from multiple exposures and HDR or other exposure blending performed in post-processing software.  The applications will span the full range of what app developers can dream up.  This starts to achieve the promise of putting mobile phones in direct competition with digital cameras and even DSLRs.  While lens selection and aperture choices will continue to give DSLRs the edge for many specialized and professional applications, the expanding options and improving image quality from smartphones will continue to expand their appeal as the camera most likely to be quickest into your hand as shooting opportunities arise.

Monday, September 01, 2014

The Redemption of High Dynamic Range (HDR) Software

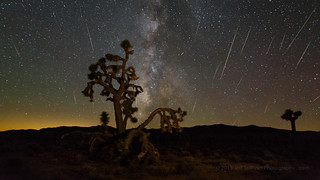
Joshua tree in Hidden Valley, Joshua Tree National Park
When I captured the image above in early 2009, I used a Canon EOS 40D.  Although that was the first Canon camera marketed as producing 14-bit RAW files, it wasn't always clear from the results that it was producing the implied 4X more color resolution compared to prior models producing RAW files with 12-bits of information.  This is the original single exposure image, fully post-processed recently in Adobe Lightroom 5.  In that single exposure result I was frustrated by the relative lack of detail in the shadows, and the highlights are lacking in detail as well, so the dynamic range, the ability of the camera to capture a wide range of bright to dark light values, is clearly inadequate.

Fortunately the image was captured in a 3-exposure sequence, so as I revisit the images from that day now, over 5 years later, I can try post-processing it using a current version of Photomatix HDR software which offers a "natural" mode which produces fewer artifacts than prior versions did..  One thing that is clear is that there is a significant amount of shadow and highlight detail present in the scene which is brought back into the HDR result.


3 exposures post-processed in Photomatix HDR software


I had been unable to produce an acceptable result for this image in 2009, but using current tools, significant highlight and shadow detail can be recovered.  High Dynamic Range software is finally getting to the point where it can produce high dynamic range.

Six days before I had captured this photo, I had written a blog post including the following:
"Many people vilify HDR; I don't get it. Most people play guitar poorly, but that won't keep me from enjoying the work of many talented guitarists. Of course everyone's entitled to their opinion and their own tastes. If classical music fans want to say, 'Ugh, I think I hear a guitar in that piece!', or photography fans want to say 'Ugh, Galen Rowell used graduated neutral density filters!', that's their privilege. Surely HDR software will get better and better at expanding dynamic range while producing unobtrusive results, and as that value is delivered for more and more shots, I'll have terabytes of exposure-bracketed images to draw upon."
Why Would Anyone Use HDR? It's Unreal!http://activesole.blogspot.com/2009/01/why-would-anyone-use-hdr-it-unreal.html
While the degree to which the HDR processing itself is still noticeable is open for discussion, I didn't care for the original which was overly light and dark at the same time, so this strikes me as an improvement.  It is also a good example of that concept I proposed which proposes that future advances in software may help us overcome current limitations in hardware, provided that you record more data than your camera can capture in a single exposure.  The way to do that is to capture an exposure-bracketed sequence, where you capture both darker and lighter exposures than your best attempt at a single exposure.

At that point in 2009 I was using HDR software roughly 80% of the time, in spite of its crude state and sometimes objectionable artifacts.  Shortly after upgrading to a Canon 5D Mark II, with a full frame sensor and much better dynamic range,  I was able to quickly drive my HDR usage down to 10% and then 2-3%.  HDR could still rescue images which could not be salvaged in single exposure form, so it remained one of many tools at my disposal, but it became more of a tool of last resort than a key piece of my workflow.  

Unfortunately by that point the use of HDR had developed negative connotations with many photographers, so in 2011 I felt the need to explain my rationale for using it at all:
"Some photographers have fallen in love with High Dynamic Range (HDR) post-processing, producing dramatic but strange results. Other photographers dismiss the often wacky-looking HDR results as 'technicolor vomit' and note that any monkey can move a slider in software to make a scene look strange, the talent lies in making a single, flat camera exposure look more like what we experienced onsite. Unfortunately, the range of light present, the dynamic range of the scene, is often far beyond what a single camera exposure can capture. So like so many polarized debates these days, the prudent path may lie somewhere in between. " 
HDR Isn't Just a Crutch, or a Crime
http://activesole.blogspot.com/2011/10/hdr-isn-just-crutch-or-crime.html 
As I look back now, with improved HDR software providing even more useful utility, as I try to process photos from my pre-2009 cameras I still have challenges producing excellent results from some of the lighting conditions I found myself shooting in.  So although my own pendulum of HDR use swung from strong support to a bias against it, as my use is rising again it's still a centrist view: I'll use it when it's useful, and it is becoming more useful.

Merced River Calm
HDR 2014, Canon Digital Rebel XTi photo captured November 2006
If you decide to buy Photomatix, you can get a 15% discount by using the coupon code JeffSullivan when you by it from its publisher HDRsoft: http://www.hdrsoft.com/order.php

Monday, August 04, 2014

Guaranteed Delivery Photo Sharing Networks: Flickr, Instagram, Twitter


A crate originally containing blasting caps, explosive charges used to set off dynamite, sits in an abandoned house in the historic mining town of Bodie, California. 

The "handle carefully" label on the box is good advice for photographers in the fragmented world of online photography sharing world.  While other sites shelter copyright violators, invade your privacy and threaten to sell your photos without any benefit to you, Flickr remains a key place for serious photographers, arguably THE place.  But if you want to connect with friends and family on social media sites, or grow your audience with photographers who haven't found or returned to Flickr yet, you may have to spread a few of your photos around a bit.  Sites don't all connect to one another, and they have different functionality, so details can get lost from site to site, and where you share to or from can affect how well your photos are received where they end up.

Let's consider Instagram, Twitter and Flickr.  Instagram can be a receptive place for mobile phone photos, but I don't spend much time on Instagram.  I have more followers on Twitter, and Twitter is known as a place for real time updates.  But Instagram photos shared directly to Twitter don't show up with a preview image, greatly reducing the odds that anyone will see, let alone respond to, your tweet.  So if I want to make a mobile phone share to Instagram and also reach my friends who might be on Twitter, it's best to post to Instagram and Flickr at once, then from Flickr share to Twitter.  A Flickr share to Twitter does result in a photo being posted with the tweet, with a thumbnail included in the left colum, so your odds of interaction with your post are much higher.  But most importantly there's also a link back to the original photo on Flickr, a full-featured "home base" for photography.

Many sites have popped up over the years enabling sharing photos, but many of them have implemented filters preventing all of the people who have subscribed to see you photos from actually seeing them.  Flickr does not prevent other photographers from seeing your work, it does not tolerate or even facilitate copyright violators like some other sites, it hasn't had privacy issue after privacy issue, there haven't been scandals where they would allow selling of your work without your knowledge or permission, and most importantly, it remains the photography place with the strongest tagging, grouping, album, location, date and interestingness-ranking functionality, that intelligent searches can be performed on.  So when your'e going to a national park and want to get ideas on where to go and what to see at that time of year, you can perform a search and find some great images and places.  Others can similarly find your images that way.  And everyone is easily accessible, you just post a question below their photograph or send them a flickrmail, there's no weird layer of site intervention over who can "friend" whom, or which people can communicate with each other.

For this photo I took an iPhone photo and used the free Snapseed app to post-process it and post it simultaneously to Flickr and Instagram.  So technically it started here as well as there.  Then I used the Flickr to Twitter sharing function to  tweet the photo with a preview image and link back here on Flickr.  It's simple, fast, gets the photo were I need it, and lets me keep my portfolio grounded on Flickr where I can best manage it.

Where I want a more subtle and controlled edit I may wait to import my iPhone images into Lightroom and upload the edited images from my PC to Flickr.  In that case I then go to the Flickr app and I can download my Lightroom-edited photo on Flickr to my phone's camera roll storage.  Like magic, any of my photos on Flickr, even ones taken on a DSLR, can be shared to otherwise mobile-centric apps like Instagram that way.

With the strong tagging/metadata and search functionality it seems like Flickr is still one of the places editors look first to find images.  It'll be interesting to see whether the new licensing functionality announced last week can reinforce and amplify that trend.

Tuesday, April 22, 2014

Planning Milky Way Photography


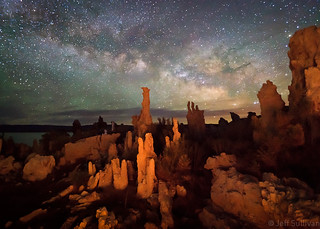
Milky Way over Mono Lake Tufa Rock Formations
By now most of us have seen stunning Milky Way shots, but when we go out at night in the Northern Hemisphere we find that the Milky Way is not prominent in the sky all of the time and the moon often interferes with its visibility as well.  The best nights and times are fairly easy to anticipate, so let's review them.

The Milky Way is like a big, flat disk, with a fatter portion in the center, much like flying saucers are depicted.  At least arms spiral out from the center, and our solar system is partway out on one of these arms.  So while the disk of the Milky Way which we're in looks like a stripe of stars across the sky, when we're looking towards the larger center of the disk containing more stars, it's brighter.  Due to the tilt of the earth's rotational axis, that bright center of the Milky Way is highest in the sky in the weeks around the Summer solstice.

As for best viewing conditions, the dark sky days around the New Moon are best, when the light of the stars in the Milky Way seem brightest and offer the greatest contrast against the dark sky background.  There is an added complication as the position of the Milky Way and constellations change nightly, moving east to west further each night, until the constellations end up in the same place in the sky at the same time the following year.  The constellations moving all the way around us in 12 months to return to the same place in the sky is similar to the movement they make in 24 hours, so to complete the trip around in a 12 month year, each month the constellations rise 24 divided by 12 = 2 hours earlier, 30 minutes per week.  So Whatever time the Milky Way rose above your horizon last week, it'll be 30 minutes earlier this week and 2 hours earlier on the following month.


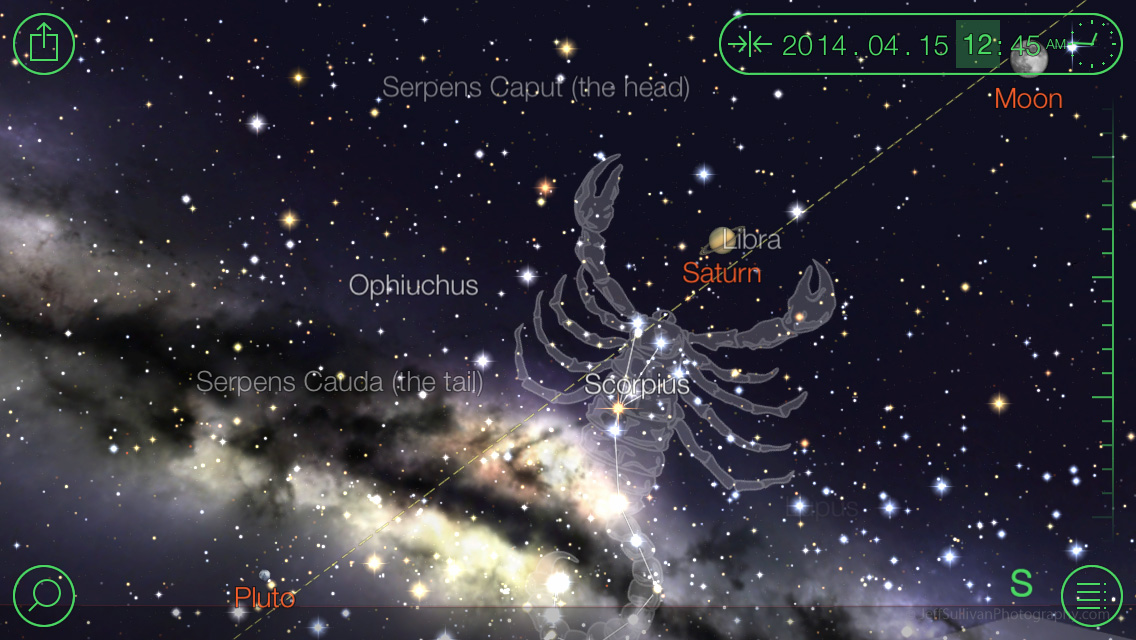
Fortunately you don't have to make a bunch of observations and calculate future times, there are apps to do the work for you.  There are a number of stargazing programs out there for both interpreting the current sky and anticipating how it'll look at some date and time in the future.  I use StarWalk, which provided the following display last week as the April 15 lunar eclipse was ending:


When you see that trident-shaped pattern of Scorpius coming up along the east to southeastern horizon, you know that the bright galactic center of the Milky Way is not far behind.  It would have been 2 hours later, 2:45 am, to reach this position in the sky four weeks earlier.

Now let's look at other months.  Note the time changes in the upper right corner as we go from early May to late May, as the moon rises roughly 90 minutes earlier after three weeks pass:


As we jump forward to dates close to the new moon dates in late June, July and August, rise time is no longer an issue as the Milky Way is already in the sky once the sky gets dark enough to see it.  So June, July and August are the most convenient months to shoot it, since you won't have to wait long after sunset to start shooting.  There's a term astronomical twilight to describe when the sky is fully dark, and a program such as The Photographer's Ephemeris can tell you when that is, both at night after the sun sets to the west and in the morning as the sun approaches to the east.


You'll notice that the Milky Way starts the night a little more vertical or "tilted up" in the sky each month.  It's also a little further along the southeast to southwest path that the galactic center takes in the sky, so you can use that knowledge to plan specific compositions.  The Galactic center also starts a little lower in the sky as you get further form the Summer solstice.

So using the new moon dates each year and a program like StarWalk, you adjust the date and time to pre-visualize what the sky looks like and determine approximately how many compositions featuring your favorite natural or man-made landmarks will look.

For more information on how to shoot the Milky Way once it's in the sky in front of you, read my prior blog post: How to Take Milky Way Photos.

To take the concept even further, you can capture sequential photos of the Milky Way and convert them into a time-lapse video like this!

Saturday, August 13, 2011

How to Create a Timelapse Video of a Meteor Shower

Perseid Meteor Shower, August 2013

The Perseid Meteor Shower runs from July 17 - August 24, with peak night occurring around August 12-14. When shooting night landscapes and trying to catch meteor showers, I like taking long exposures one after another, so you catch anything which flies through your camera's field of view. If you shoot continuously for a while and catch a couple of hundred exposures or more, you can even assemble those shots into a time-lapse video.

Lets do a little math to figure out how your still shots will transfer to video. When deciding how long to shoot, bear in mind that this is a time-lapse video, so in playback as video everything is dramatically sped up. Each frame is a 5 to 30 second shot, but video is 24 or 30 frames per second. To make the meteors last more than 1/30th of a second, you may want them to be present for two frames of video, and assemble your video at a relatively slow frame rate of only 12 shots per second, so in video formats that play at 24 to 30 frames per second, the meteors show up for at least two frames. Fortunately our eyes and minds are quick enough for us to perceive the meteors with some persistence even though they show up for only 1/12th of a second.


On a dark night your exposures may be 30 seconds or more, so at 24 frames per second each hour of shooting will give you less than 5 seconds of video. With the nearly full moon last night, there was enough light that I was able to reduce my exposure time to 5 seconds. I set an external timer (intervalometer) to take the next shot one second later, so I took one very 6 seconds, or 10 shots per minute. So if I'm using a slow frame rate of 12 frames per second to make the meteors more persistent in the video, I'll end up with almost one second of video per minute of shooting. Adjust your exposures per minute and video frames per second math to figure out how fast you want your shooting sequence to play back.

If you'd like to explore time-lapse photography yourself, download the free VirtualDub software which can convert a sequence of JPEG files into video, and check out the forum on www.Timescapes.org for discussions on techniques. You'll need a tripod of course, and your sequence of still images will turn out best if you use a remote switch that has an intervalometer (timer) function.

Update March 2016: One more thing, meteors are more common after midnight, so I usually arrive on site around 11 pm to give myself an hour to set up before I have to start shooting.  Basically where you are on earth rotates around to the front of the Earth's path through space at midnight, so the sky above you collides with more comet dust from then until astronomical twilight starts before dawn, as this article explains.

Monday, August 01, 2011

Create a Timelapse Video on Your Digital Camera

Lunar Moonbows in Upper Yosemite Falls from Jeff Sullivan on Vimeo.

Timelapse videos are easy to create on your DSLR. There are many software packages which will facilitate the process, some better than others, but I'll describe the simple and relatively low cost workflow that I currently use. You'll need software on your PC which can convert a sequence of JPEG files to timelapse video. I use VirtualDub (free download) to create an AVI format video, then I use MPEG Streamclip (free download) to convert the huge .AVI file to a much smaller (albeit lower quality) MPEG-4 for online use. Here's the process from shooting to finished video:

Clean your camera sensor. It is hard enough to remove dust from one image... picture having to do that 300 times. Even copying dust removal from one image to the others, the data changes over time (from shot to shot), so it really won't work well across the whole sequence. It's far, far better to remove the dust up front. Clean your camera sensor!.

Put your camera on a sturdy tripod. Install a fully charged battery and a blank, freshly-formatted memory card which can handle several hundred images.

Compose your image expecting to lose some of the vertical information if you'll convert the sequence to HD video with a narrow HD shape (16:9 aspect ratio).

Manually focus your camera and switch off automatic focus. If you forget to do this, your camera will insert delays in the sequence as it hunts for focus, making the playback jerky at best. Worst case, your camera may lose focus and you'll end up with a whole lot of blurry images.

Make some test shots to determine best exposure. If practical, set exposure manually so it won't change from shot to shot and cause flashing (flicker) as different exposures come up during playback. If the light will change a lot during shooting (sunrise and sunset), you can use automatic exposure, but then the exposure during the video is artificially stagnant, and you'll need to to "deflicker" the timelapse to reduce flashing from frame to frame when producing the video. You will learn some very interesting and important things about your DLSR in this process! When your DSLR changes the exposure up or down 1/3 stop from shot to shot, simply "fixing" the exposure during editing will not result in similar-looking images from shot to shot! Even adjacent images taken a fraction of a second apart may have different white balance, and a slight exposure change also affects contrast, color saturation, and so on. Once you've gone through the process a few times your whole approach will change and you'll try to maximize quality and consistency in-camera, not during editing.

Shoot several hundred images in a row. You can make the timing from frame to frame consistent using an Intervalometer Trigger (external timer), or you can simply hit the shutter release over and over (perhaps use the display of the prior image on the camera rear LCD as your cue to trigger the next shot and keep them at a fairly consistent rate). Remember that your finished product will be 30 frames per second, so you'll need 300 images for each 10 seconds of video. I recommend shooting in RAW format so you can adjust the exposures during editing, especially if you shoot at sunrise or sunset where the light will change over the course of your timelapse.

Read your camera's files into your editing software and crop them to the 16:9 aspect ratio of HD video. Remember that you have far more resolution in your DSLR than you need for HD video, so you can perform a "digital zoom" and focus on only a portion of your original camera image. Software strong in batch editing such as Adobe Lightroom (free trial available) will enable you to apply a consistent crop, exposure adjustments and even spot removal across the entire sequence of images. You'll also want to impose one consistent white balance across the entire sequence. Some video processing software (such as Adobe Premiere I believe) will even let you specify a starting crop and a different finishing crop, then calculate a zoom and pan across your sequence of images.

Save your files in sRGB JPEG format at 1280 x 720 resolution for video to be used on sites like YouTube or Flickr that only allow smaller 720p HD format video, or save them at 1920 x 1080 resolution for 1080p video to be uploaded to sites such as Vimeo. If you'll use the VirtualDub software, it will want you to point to the first image in the sequence then look for a sequential numbered file, so if you used automatic exposure bracketing while shooting you may be editing and saving every third file, but you can rename them sequentially so VirtualDub can order them properly.

Read the sequence into VirtualDub. It's important to notice when trying to import them that in the dialog box where you're looking for the first file to select, the file format has a drop-down menu which enables you to specify that it should look for an image sequence in JPG format.

Add filters as desired, in the order that you want them to apply. For example, Virtualdub can crop and resize larger JPEGs, perform sharpening at the new lower resolution, and you can search for and install a third party "MSU deflicker" filter to improve image consistency from frame to frame across the whole video. Check your frame rate and for maximum quality (but shorter result) change the default 10 frames per second to 30.

Save the video in AVI format. That's a very high quality format, so it may save a file of a gigabyte or more! Enjoy this high quality file on your computer (or read it into video editing software to burn it to Blue-Ray DVD).

To create smaller files for online sharing, read your .AVI file into MPEG Streamclip. Save to MPEG-4, playing with quality vs. file size tradeoffs until the results are what you want.

Upload your results to your favorite video sharing site. That's it! It takes a little more planning to pull off well and a little more time to produce the finished result, but you can produce some amazing videos.

For more information on shooting timelapse sequences, I recommend browsing the discussion forums over on www.Timescapes.org.

Note: although Adobe Lightroom has a retail list price of $300 to buy, Adobe offers a free trial.


This is an updated re-post of my November 2010 blog post since the link to the original timelapse video on Flickr appears to have broken. Instead I've posted links to videos on Vimeo:

Pfeiffer Beach Winter Sunset from Jeff Sullivan on Vimeo.

Wednesday, July 27, 2011

HDR-Friendly Workflow, Using Adobe Lightroom for Realistic Results

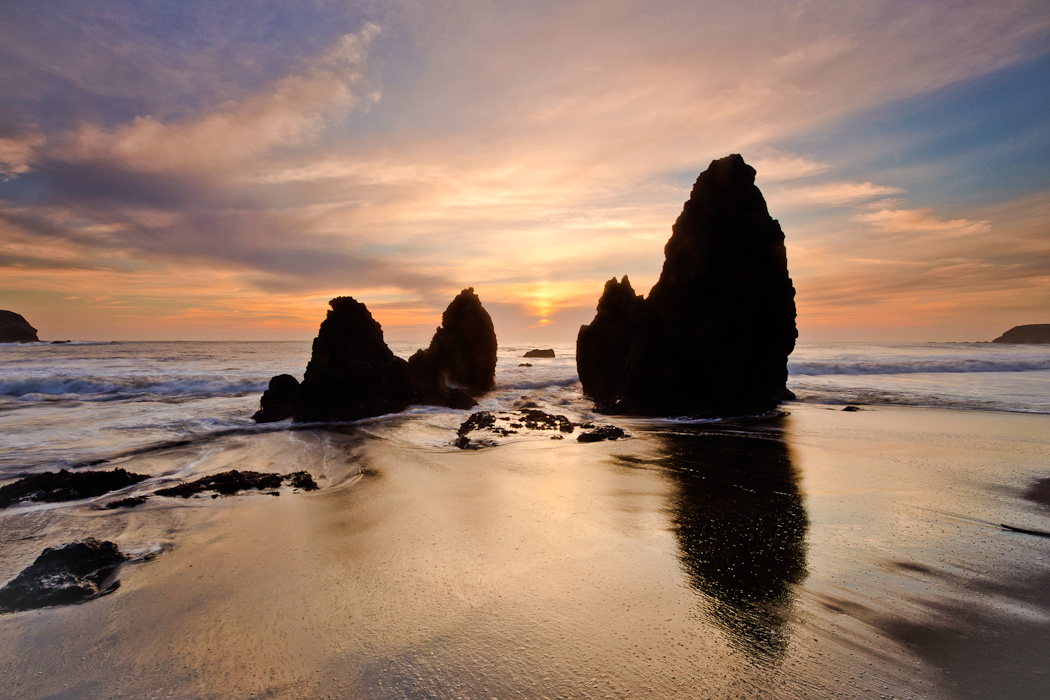
Vanishing Water, originally uploaded by Jeffrey Sullivan.
Rodeo Beach, Marin County, California
A question came up a while back about workflow for HDR, and using a common editing program like Adobe Lightroom with it. I use Lightroom on all photos, and Photomatix 4.0 for HDR on a few with particularly challenging lighting conditions. Here's the approach that works extremely well for me.

I shoot in RAW and find Lightroom to be an excellent way to process files for many different shooting scenarios. The key is Lightroom having been designed from the start to facilitate operating on multiple files, such as its ability to copy development settings from one edited file and apply them to any similar images in the batch you're editing. It's also easy to use, so you don't need a bunch of obscure keyboard commands and you don't need to record scripts like Photoshop users always seem to be doing to create a given effect. At the highest level, my approach is this: for the images that I consider HDR potentially useful for, I simply perform the most basic adjustments like white balance adjustment, dust removal and some noise reduction, then convert these low noise, color-corrected images to JPG prior to performing HDR techniques. Using JPG images as input to the HDR process is exactly the approach recommended by HDRsoft for their Phototomatix software.

Single exposure HDR.  Deeth, Nevada
To cover the entire workflow from shooting to finished file in more detail, first I shoot automatic exposure bracketed images nearly all the time... not to get the best exposure, but to get the best contrast and color with an acceptibly low level of noise. One dirty little secret of digital photography is that sensor performance is not necessarily consistent across different exposures. What I'm trying to say is that three different exposures cannot simply be exposure-corected and turn out identical, even in the most basic sense like contrast and color. Just as was the case with film, the darkest exposure will almost always look best in color and contrast, the most likely to be good straight out of the camera (with minimal brightness adjustment), but it will require some "darkroom" adjustment of exposure, brightness and so forth, and in the end it may have too much noise in darker areas of the image. I do have a high success rate though, and at the very least it provides a reference image to try to edit the next best exposure to look like. It won't always be as straightforward or easy as you might hope, but at least you have a nice high bar to shoot for. Test this for yourself. Try shooting 3-shot exposure bracketing sequences in challenging sunrise and sunset lighting conditions, and adjust all three to see which looks best. Play with different bracketing and exposure compensation settings to see what works best on your camera.

On my Canon 5D mark II my default spacing is +/- 1 1/3 stops between exposures, but I also bias the whole sequence 2/3 stop darker (using exposure compensation at -2/3 EV). Therefore I end up with exposures a -2 EV, -2/3 EV and +2/3 EV. My Canon 40D doesn't quite have the same dynamic range nor does it have noise levels so low, so I may use -1/3 exposure compensation and shoot an Automatic Exposure Bracketing sequence of +/-1 stop. Either way, I examine the results and adjust my approach to the shooting conditions.

3-exposure HDR. Sunrise rainbow, Eastern Sierra.
Having multiple exposures and the ability to choose HDR later if I like is a benefit, but I've found that by having better single exposures and rarely having blown out areas, especially in my best, darkest exposure, I can rely on HDR a lower percentage of the time simply to get a useful result. In fact, not having to rely on HDR as a crutch in my typical daily workflow frees me up to consider it in much more selective cases, to achieve much more advanced goals like mixing together long exposures of different lengths. (A range of shutter speeds is particularly useful with flowing water, to blend in different textures.)

Knowing that I'm using HDR for texture affects my shooting choices. For example, I may tune my bracketing sequence to provide three specific textures to flowing water. The speeds I require very depending upon how fast the water is moving (waves vs. streams vs. waterfalls), with different ranges of shutter speeds useful for different water speeds (such as different waterfall heights).

So my workflow starts with a RAW file in Lightroom receiving basic adjustments and getting saved to JPEG. Then Photomatix 4.0 does some initial processing and shows previews of how the result will turn out using something like 8 different techniques. This new feature makes it easy to pick one of the more natural renderings, one of the more unreal ones, or take over and fine tune the settings to get what you want. When done with the HDR processing, I save a 16-bit TIFF file.

3-exposure HDR.  Mono Lake, California.
As good as Photomatix 4.0 has become for facilitating your pursuit of a certain style of result, I still find it critical to run the TIFF file back through Lightroom for fine tuning. While HDR changes exposure around a scene in the highlights and shadows much like our eyes might, our brains reconstruct the scene in our minds with full impact of the bright shadows and dark shadows. HDR has no such interpretation step, so it can leave an image looking far too "flat". Approaches such as Tone Mapping are an attempt to restore some emphasis to the edges of light and dark areas, but such an approach with a single strong tool like that often leaves an image overcooked. Instead, try applying your changes very lightly in your HDR tool, then go to a full-featured editing tool to use its full power to restore a realistic look.

In Lightroom go to Library mode, simply hover your mouse over the folder name where the new TIFF files were saved, and (on a Windows PC) your right mouse button will reveal a menu with the Synchronize Folder commmand which will go find your new files and import them into Lightroom so you can make fine tuning adjustments to color, contrast, vignetting and so on.

3-exposure HDR.  Joshua Tree National Park.
If you do the best you can post-processing the HDR in Lightroom and like some of the characteristics of the result but still don't think it's entirely realistic, you still can use that to your advantage. Go produce your best single exposure edit in Lightroom on a single file, then bring both the HDR and single exposure result into layers in Photoshop (or Photoshp Elements), and blend them. I experiment with that maybe once a year when I get access to the latest Photshop trial software, but I prefer to spend my time shooting rather than in fromt of a computer, so Photoshop isn't in my workflow (or installed on my newest computer) at the moment.

For anyone not using Lightroom yet, you can download a copy at Adobe.com and use it in free trial mode for 30 days. The latest Photomatix 4.0 is useful to revisit if you tried or currently use a prior version. It's available at HDRsoft.com (it adds watermarks to your images, but if you buy a license later you can easily remove the watermarks, at least from the processed TIFF files output by Photomatix).

I have an HDR set here where you can see how various combinations of Lightroom and Photomatix have produced various results over the years: http://www.flickr.com/photos/jeffreysullivan/sets/72157622008543219/

Wacky tone-mapped HDR from an earlier version of Photomatix.
Now that HDR has been on the market for a few years, it seems like there are many people who didn't like its early output, and there are others who did and use it all the time. The assumption seems to be that you either like HDR or you don't, it either worked for you or it didn't. However, there's a growing third camp of users who were able to wrestle HDR into submission and use it lightly in a realistic manner when useful, and perhaps create something wild from time to time as well. My opinion is that Photmatix 4.0 is far enough ahead of past versions in functionality and ease of use that it is worth a try, regardless of what you may have thought of HDR software or results in the past.

If you decide to buy Photomatix HDR software, I do recommend the version with an interface to Lightroom and Photoshop, to give you the most efficient workflow.  You can get a 15% discount by using the coupon code JeffSullivan when you by it from its publisher HDRsoft: http://www.hdrsoft.com/order.php

Wednesday, May 25, 2011

How to Take Milky Way Photos

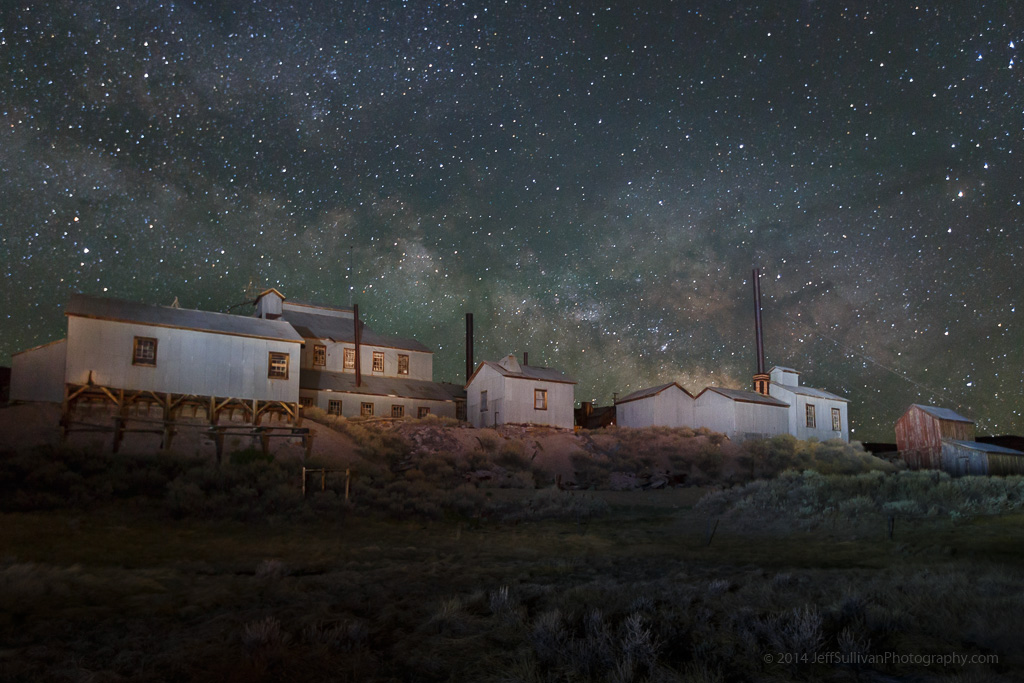
Bodie's Standard Mill
Milky Way over Bodie's Standard Mill
Many digital cameras these days can do surprisingly well at capturing images at night. Their sensors are more sensitive than your eyes, especially at capturing color at night.

Photography has always involved multiple steps, with exposure being only one part of the equation. In the days of film, the darkroom enabled additional influence to be applied during development, and then again during printing. Unless you were using a Polaroid camera, there was no such thing as "straight out of the camera." Maybe you trusted someone in a drug store to do your developing and printing for you, but that wasn't an optimal situation and that certainly doesn't mean that no adjustments were made. For the most part, the entire concept of "straight out of the camera" is a myth that is best set aside as soon and as thoroughly as possible.

Out of this World
Milky Way over Mono Lake tufa formations
Today with digital cameras your darkroom is on a computer, implemented in software. Milky Way shots are a great example of images that you won't get the most out of until you get in the habit of spending 5 minutes in your digital darkroom to complete the photographic process.

If you find a dark place outdoors to shoot and you can make out stars and the lighter, more dense band of the Milky Way, a little postprocessing can get you a lot further. As with my previous blog post you need to shoot on a tripod, using manual aperture and manual focus. Having your long exposure noise reduction turned off is not critical since we're dealing with single exposures for Milky Way shots.

Alien Terrain (vertical) Shoot with your widest focal length lens to minimize star movement in the field of view, have it opened to its widest aperture to minimize exposure time. You may still have little enough light that you shoot at the longest exposure time (generally 30 seconds) or you may need to shoot in "bulb" mode for a longer time in order to get enough light. Always shoot in RAW mode so you have far more adjustment capability in post-processing software.

Shoot near the date of a new moon, so there is as little light pollution as possible. The last thing you need to know, probably the most important thing during planning your shot, is how to predict when the most intricate, dense, bright center of the Milky Way is in the night sky! In Summer the sun is up roughly 2/3 of every day, but the Milky Way crosses the sky in the night. The center of the Milky Way is towards the constellation Sagittarius. You can look up the dates when Sagittarius is high in the sky, and that's when the Milky Way is most intense: http://homepage.ntlworld.com/mjpowell/Astro/Sgr/Find-Sagittarius.htm

In simple terms, it highest around midnight around July 22, two hours later per month earlier (2am in May), two hours earlier per month later (10pm in August). So really your best shooting will be on days near the new moon dates, and preferably within 7 weeks or so of July 22.

So lets assume you go out on the right night, shoot south towards Sagittarius, capture a RAW file with some stars showing, and maybe you can barely make out the bright stripe of the Milky Way and its slightly more dense center.

Well, if you were in a darkroom... how do you lighten the Milky Way while keeping the background sky dark? The simple answer is dodge and burn... selectively darken some areas while lightening others!

Southern California Night Sky In +Adobe Photoshop Lightroom (download a 30 day trial if you don't have it already, AFTER you collect some images to process) use the paintbrush tool (under the Develop module) to select and lighten the area around the Milky Way. Use the paintbrush tool to darken the sky everywhere else (this makes both the Milky Way and the stars pop).

To do even better, you can also increase contrast while performing these functions, further darkening background light levels, including noise. Adjust exposure and brightness so the fainter stars in the Milky Way get brighter while background and noise gets dark. You can increase saturation slightly on the Milky Way, but increasing contrast has that effect already, so you might not need to.

Rocket Trail
NASA satellite launch over the California Coast
Don't worry too much about how much noise your camera produces... after you adjust contrast and brightness, just crank up the noise reduction. After all, there isn't generally much detail to lose by doing that. In Lightroom for dark, noisy photos I try to max out noise reduction at 25 or maybe 30, but lately for night skies I've been going into the 60s.

Lightroom can also selectively adjust saturation and brightness of individual colors. If you shoot too close to sunset and "blue hour", or during a too-bright moon that is too full (and creating blue night sky), it can be handy to darken a blueish background sky to help separate that from the stars (just did that on a star trails shot). On the other hand for dark new moon skies, like you should have if you're planning ahead for Milky Way shooting, there is little or no light scattering turning the sky blue. A lot of the Milky Way stars have a slight blue tint though, so selectively raising brightness of blue can help separate them from dark background and any noise.

Perseid Meteor Shower 2015
Perseid meteor shower in the Mojave Desert
It's a balancing act between white balance, adjusting individual colors, and tweaking the brightness and especially contrast of the area the Milky Way covers, but you can find a reasonable compromise pretty quickly. Once you do fairly well adjusting one shot, Lightroom enables you to copy your develop settings and apply them to additional photos.

There are other subtle considerations of course, especially for special situations such as meteor showers, but this will get you off to a great start!

---

Milky Way Arch Over Standard Mill
Milky Way arch panorama
If you'd like a little extra help, I lead one night photography workshops in the Wild West "ghost town" of Bodie.  For more practice, you can join me for a longer tour of Yosemite, Death Valley or the Eastern Sierra.

In many cases I offer a visit to Bodie adjacent to one of those longer workshops, so you can shoot in Bodie to start or end your trip.

If you're looking for dark places to try night photography on your own, consider anywhere away from metropolitan areas. I identify over 300 great locations for landscape photography in my new 320-page book, "Photographing California Vol. 2 - South", pictured below.

For night photography in California, focus on locations in the Southern California desert from Anza-Borrego State Park through Joshua Tree National Park and Mojave Preserve to Death Valley National Park, or on the Eastern Sierra region.

I offer author-signed copies on my Web site: www.JeffSullivanPhotography.com

How To Create Star Trails Photos

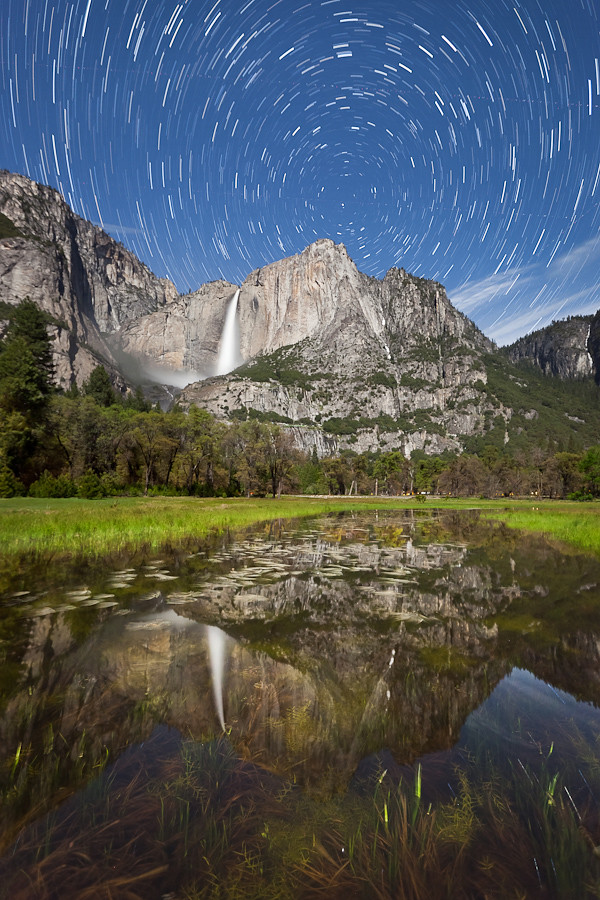
Star Trails Over Yosemite Falls

The Basics

With today's digital cameras it is surprisingly easy to create star trails images. At the highest level, all you do is run a sequence of night star shots through a star trails program and enjoy the result. As is often the case, the challenges come in the details.

Yosemite Falls Moonbow Star TrailsYou'll need to capture images covering 30 to 60 minutes or more. A sturdy tripod is essential. You can trigger exposures manually, but that's tedious and not fun to do for an hour at night. Ideally you'll have a remote trigger that can lock down to fire off sequential shots, or even better, an intervalometer which takes shots at certain intervals which you define.

You'll need to focus your lens on an object at close to infinity, and leave the focus mode set to manual so it won't hunt for focus in the dark. The focus ring of your lens probably continues past that point to compensate for differences as temperatures fluctuate, so focus during daylight on a distant object and note where this is, or if your lens has continuous focus ring with no visible scale, focus your camera during the day, switch it into manual, and carefully tape the focus ring with removable painter's masking tape or gaffer's tape.

You'll want to take sequential shots close together so the star trails to be continuous, so turn off your camera's long exposure noise reduction.

You'll also want a consistent exposure, so use your camera in Manual exposure mode.  Cameras have slightly different sensitivity to light, and the moon brightness (phase) and local light pollution can affect your exposure from night to night, so you'll need to run some tests to determine what settings to use for your individual shots.

Night Rainbows in Lower Yosemite Fall
Full moon exposure: 15 seconds f/4, ISO 3200
Under a bright full moon in clear skies I might start at f/4 at ISO 3200 for 15 seconds. If you'd prefer to drop your ISO to 1600, simple double the shutter speed for the same overall exposure.  On a darker night you can choose a wider aperture, higher ISO, or increase your exposure time using an external intervalometer.  Take lighter and darker shots to ensure that you've identified an exposure which isn't too bright or too dark, then set up your camera to capture a sequence of images at the optimal settings.  The main exposure of 15 seconds enables me to quickly use Automatic Exposure Bracketing to take lighter and darker exposures at 30 and 8 seconds to verify the best exposure setting, then I can pick an equivalent exposure at the camera's longest internally available setting (currently 30 seconds on most cameras).

Once you have the basic exposure figured out, take that exposure over and over until you reach 30 to 45 minutes or more total. Leave as little time as possible between shots.

For this example I used about 80 shots of 30 seconds each, covering 40 minutes. I used the free StarStaX software (www.StarStaX.net) in "lighten" mode, where the lightest pixels are kept as images are merged, creating the trails as the stars move from frame to frame.

Intermediate Considerations

In very long exposures, digital camera sensors can produce random spots of bright single pixels referred to as "hot pixels".  If you're shooting on a relatively warm night, about 60 to 70 degrees or warmer, with many cameras you may start to see more hot pixels the warmer it gets.  StarStax can help you eliminate them.  At the end of your star trails sequence, put your lens cap on and take a few more images of the all-black capped lens at the same settings you've been using.  The only data in the image should be the hot pixels.  StarStaX allows you to identify these images so it can automatically eliminate those hot pixels.
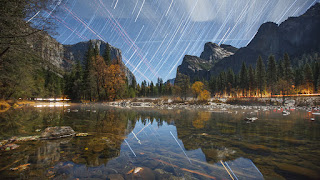
Yosemite is under a major flight path for airplanes
In the old film days, star trails were accomplished by leaving a camera shutter open for one long exposure, even for many hours.  Some purists believe that everything should be captured in one exposure.  Since the photographic industry honors the achievements and traditions established over many decades, photographers who learned on film still dominate the industry in many ways.  Change is slow.  So you might consider a preference for long-held film best practices to be "traditionalist" thinking as well.  There's nothing inherently wrong with this approach, but it's not inherently right or better either, it's just a particular bias that people are welcome to hold if they like.  Unfortunately, few places these days are so unpopulated and uncrowded that you can completely avoid interruptions such as passing headlights or other photographers' flashlights.  So in many cases a single long exposure is likely to be interrupted by a wide range of lights, from airplanes passing overhead to cars or nearby flashlights.  A general approach to be able to edit these out is to capture many exposures, and edit them out frame by frame.

When editing airplane trails out of a starry sky, it is easiest to edit out short ones.  Local light pollution on your foreground, or on a distant road, can be quickly and easily taken out as described below, provided that you have enough exposures to provide images with those areas not polluted with lights.

Advanced Considerations
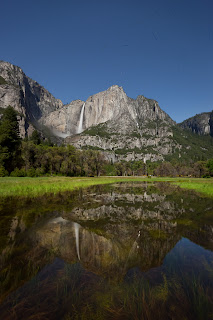
Darken mode
Unfortunately in Yosemite Valley, the cars driving by create lasting light trails, and headlights spill onto nearby landscape features as well, making them harder to manually edit out than narrow, linear airplane trails. To remove this sort of broad local light pollution, there's also a "darken" mode in StarStaX, which keeps the darkest pixels in the sequence of images that you send it, eliminating the effects and trails of the car headlights.

This also eliminates the star trails, but by using layers in Photoshop and blending that center portion of the darkened sequence into the lightened star trails sequence to get a star trails image without the car lights.

Once you decide to use separate images, you might question whether or not to use 30 second exposures, since that tends to also require high ISO, which many photographers associate with noise, or and very wide apertures, which many photographers associate with lower depth of field and/or softness in focus.  These are valid considerations and if you have an intervalometer that can handle multiple minute exposures, there's no harm in testing different approaches.  But the image stacking process in StarStaX eliminates most noise, so ISO isn't as much of a concern as many photographers tend to assume (at least not for noise).
One sequence of 30-second images
Consider also that you are not nocturnal, and you're far more likely to make mistakes late at night, so do you really want to complicate a process that you'll enter into when somewhat mentally impaired?  You can set up everything when you're alert during the day or evening, then start the image capture later.  I've done that, then started the intervalometers that I had programmed on two cameras for night shooting, only to find the next morning  that I had 1200 exposures of the lens caps that I had neglected to take off.  There's a lot to be said for an easy, repeatable, and infinitely simple process with maximum applicability across as many situations as possible!  I can set 30 seconds in camera, I can have a one second interval between shots.  Done.  It's hard to mess that up.

On some external intervalometers I can lock the shutter release button down to have zero seconds between shots if the camera is set to continuous shooting mode, but there are two new variables introduced, the shooting mode and the intervalometer's features, which will eventually cause problems on a different combinations camera and intervalometer.  Keep it simple, or pursue every last setting for ultimate quality if you wish, but understand that increasing complexity will increase your failure rate.  Time and travel expenses are often the most valuable commodities for a landscape photographer, and long exposures and our desire to sleep make night shooting time even more precious.  How many opportunities do you want to miss, when your itinerary doesn't allow staying an extra night to re-take a shot?

There are other subtle considerations on the capture, post-processing, and output/printing portions of the process, but this will get you off to a great start.

So start simple, and gradually try more ambitious shots or more complicated techniques as you like, but go give star trails a try!

---
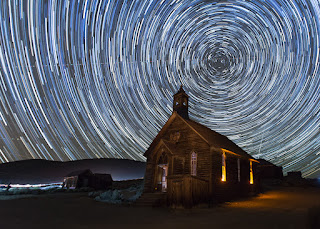
Join us to learn night photography in Bodie!
If you want a little extra help, I lead one night photography workshops in the Wild West "ghost town" of Bodie.  For more practice, you can join me for a longer tour of Yosemite, Death Valley or the Eastern Sierra.

In many cases I offer a visit to Bodie adjacent to one of those longer workshops, so you can shoot in Bodie to start or end your trip.

If you're looking for dark places to try night photography on your own, consider anywhere away from metropolitan areas. I identify over 300 great locations for landscape photography in my new 320-page book, "Photographing California Vol. 2 - South", pictured below.

For night photography in California, focus on locations in the Southern California desert from Anza-Borrego State Park through Joshua Tree National Park and Mojave Preserve to Death Valley National Park, or on the Eastern Sierra region.

I offer author-signed copies on my Web site: www.JeffSullivanPhotography.com